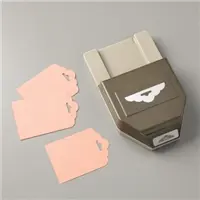
• Home
  • Contact
    • Contact Me
    • Prize Patrol Claim Form
  • Galleries
    • Project Gallery
    • Video Gallery
  • Catalogs
    • View Catalogs Online
    • Request FREE Catalogs
  • Favorites
  • Join
    • Top 10 Reasons to Join
    • Order Your Starter Kit
  • Shop ★
    • Shop Online With Me
    • Current Host Code
    • Pixie Perks
    • Retired Items for Sale
    • Gift Certificates
    • Product Shares
    • In Color Club
    • Paper Pumpkin

The Paper Pixie

The Paper Pixie

September 1, 2017

Scalloped Tag Topper Treat Box with Video Tutorial

Print Friendly, PDF & EmailCLICK TO PRINT

Today's project is my swap for my Paper Pixies team meeting this week – a Scalloped Tag Topper Halloween Treat Box!

This box is so easy to make! You can make 2 of these out of one piece of 8-1/2″ x 11″ cardstock. I'm thinking this might be this year's Halloween treats for my trick-or-treaters!

Without further ado, here's my video tutorial:

Thank you so much for stopping by today! I hope you have a wonderful and blessed day and a restful Labor Day weekend!

Measurements:
  • Pumpkin Pie cardstock: 5″ x 8-1/2″
    • Score along the 8-1/2″ side at 2″, 4″, 6″, and 8″
    • Rotate clockwise and score along the 5″ side at 2″, 3″, and 4″
  • Spooky Night DSP – 1-3/4″ x 3/4″ (4 pieces)
Supplies (click on any product to shop online):
144749
Spooky Cat Photopolymer Stamp Set – 144749
140931
Basic Black Archival Stampin’ Pad – 140931
105117
Pumpkin Pie 8-1/2″ X 11″ Cardstock – 105117
144610
Spooky Night Designer Series Paper – 144610
133324
Scalloped Tag Topper Punch – 133324
122334
Simply Scored – 122334
102300
Bone Folder – 102300
129026
Fuse Fast Adhesive – 129026
103579
Paper Snips – 103579
144129
Basic Black 3/8″ Shimmer Ribbon – 144129

WHISPER WHITE MEDIUM ENVELOPES

SEPTEMBER HOST CODE – 7FPJ737R

Please apply this month’s host code for all orders under $150. If you place an order of $75 or more (before shipping & taxes), you’ll earn this month’s free gift: Whisper White Medium Envelopes!

  • $75 – $149.99 Order: You must apply the host code to your order to receive this month’s free gift.
  • $150+ Order: Do not apply the host code. You’ll automatically qualify for my free gift this month as well as earn Stampin’ Rewards!
Pin this Post
Share this Post
12 Comments
Leave a Comment
12 Comments
  • Jackie Beers
    September 1, 2017

    I’m so happy you made the box. And you rocked it with Halloween! Then topped it with an awesome video!

    Reply
  • Brian King
    September 1, 2017

    I have one of these! I have one of these! That reminds me that I also have three little chocolates. 🙂 Such a great project, Julie!

    Reply
  • Elisha Smith
    September 1, 2017

    So cute!! Must try now!! Thanks again for the inspiration and wonderful video – so clear and concise!

    Reply
  • Terri
    September 1, 2017

    Cute project! Thanks for sharing. I really enjoy your videos.

    Reply
  • Debbie Perry
    September 1, 2017

    Love this! Thank you!

    Reply
  • Sue Manlove
    September 29, 2017

    This is a wonderful project for those who want boxes for multiple seasons and this one is perfect. Thanks for sharing

    Reply
  • Sandra J. Grupka
    October 12, 2018

    I love all of your projects. I made 30 of these for the Cancer patients on dialysis at our local hospital and I can’t wait to give it out to them. It will certainly brighten up their lunch trays.

    Reply
  • Denise Schneider
    October 22, 2018

    Thnks for showing!!! They were so fun to make

    Reply
  • Alison Humphrey
    January 26, 2019

    Fabulous tutorial and a great idea for a all year a round treat box. Will be making an Easter version for my friends at work. Thank you.

    Reply
  • Glenda J
    September 23, 2019

    Thank you, thank you….I needed a treat box to go with a Halloween Card swap and this little box is perfect. Your video is SO helpful and easy to follow. Thanks for all you share on your very blog.
    You are very creative and generous with sharing how to create these wonderful projects. Thanks again!

    Reply
  • Kathy Miller
    September 8, 2020

    Hi
    Just FAB!

    Do you have a diagram for this project? Thank you for your adorable projects.

    K.

    Reply
    • Julie DiMatteo
      Kathy Miller
      September 8, 2020

      Hi Kathy! I don’t currently have a template created for this project from 3 years ago, but I’ll consider creating one!

      Reply

Leave a Reply Cancel Comment

Previous Post
Quilt Builder Set of Mini Cards with Facebook Live Video Tutorial!
Next Post
Spooky Cat Hershey’s Kiss Treat Holder with Video Tutorial
Hi, I’m Julie DiMatteo!

Hi, I’m Julie DiMatteo!

I'm an Independent Stampin' Up!® Demonstrator in Alpharetta, Georgia

APRIL HOST CODE:

NEF7X3AX

Find Me on Facebook!

Categories

AFFILIATE DISCLOSURE

I, Julie DiMatteo, may receive compensation for recommendations made in reference to the products or services on this blog. This compensation may be in the form of money, services or complimentary products and could exist without any action from a blog visitor. Should you purchase a product or service that was recommended by this blog, it is understood that some form of compensation might be made to me.

As an Amazon Associate I earn from qualifying purchases.

I only recommend products or services I use personally and love!


streamyard

DISCLAIMER

The content in this blog is the sole responsibility of Julie DiMatteo as an Independent Stampin' Up!® Demonstrator. The use of and content of classes, services or products offered is not endorsed by Stampin' Up!®.
  • About
  • Privacy Policy
  • Terms of Use

© 2010-2021 THE PAPER PIXIE. ALL RIGHTS RESERVED. Site Powered by Pix & Hue.