Today’s project is the one I demonstrated last night during my Wednesday Weekly Facebook Live!

I followed Amanda Charlesworth’s tutorial HERE. Isn’t this a fun treat box? Here’s what the inside looks like:

I fit a pretty decent amount of Hershey’s Kisses into this treat box! The Designer Series Paper on the inside is hiding the magnet (smile). Speaking of, I purchase my magnets from Spider Magnets on eBay and I use the 8x1mm magnets.
I really love the checkered pattern in the Merry Little Christmas Designer Series Paper! Especially with a little splash of silver with the foil paper and the tinsel trim. Without further ado, here’s my video tutorial:
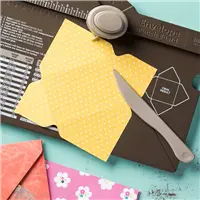
And here’s the template I showed during the video:

Thank you so much for stopping by today! I hope you’ll try making this treat box. It’s super fun to make and you can change the look of it so easily by choosing different colors and patterns. I hope you have a wonderful and blessed day!
Measurements:
- Basic Black treat holder base – 9-3/4″ x 7″
- Scored on the long side at 1-3/4″, 4-1/4″, and 7-1/4″
- Scored on the short side at 2″ and 5″
- Merry Little Christmas DSP – you need the following 5 pieces:
- 2-3/4″ x 1-1/2″ (2 pieces) – for both sides of flap
- 2-3/4″ x 2-1/4″ (2 pieces) – for front and back
- 2-3/4″ x 2-3/4″ (1 piece) – for bottom
Supplies (click on any product to shop online):


[wc_divider style=”solid” line=”single” margin_top=”” margin_bottom=”” class=””][/wc_divider]


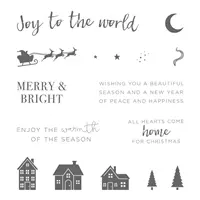
For a limited time, get the Merry Patterns Stamp Set for FREE when you host a party with $300 in sales (or place a $300 order)! You’ll receive this exclusive stamp set in addition to the fabulous Stampin’ Rewards you get when you host a Stampin’ Up! party.
PLEASE NOTE: The Merry Patterns Stamp Set is only available during the host promotion, so don’t miss out!
Orders must be closed by 11:50 PM (MT) on October 31.
[wc_divider style=”solid” line=”single” margin_top=”” margin_bottom=”” class=””][/wc_divider]

SEPTEMBER HOST CODE – 7FPJ737R
Please apply this month’s host code for all orders under $150. If you place an order of $75 or more (before shipping & taxes), you’ll earn this month’s free gift: Whisper White Medium Envelopes!
- $75 – $149.99 Order: You must apply the host code to your order to receive this month’s free gift.
- $150+ Order: Do not apply the host code. You’ll automatically qualify for my free gift this month as well as earn Stampin’ Rewards!
Hi Julie,
I *LOVE* how methodic you are in giving instructions, makes it so easy to reproduce the project!
I have copied the measurements and think I discovered an error in the instructions? Are the measurements for Front & Back and Bottom mislabeled? There should be TWO pieces for front & back and only ONE for the bottom.
THANK YOU for sharing your ideas, talent and instructions with us all – HUGS from T’Rivers, WI
Nov 7, 2022
Hi Lu Ann! I’ve fixed my error – 5 years later. Thank you!
I love making treat boxes and yours are so easy to follow. Thank you for the templates!
Thank you SO very much for this terrific project, video and measurements! It has so many possible uses for a variety of holidays and gift-giving! You made my day! (I found you thanks to this project trending on Pinterest.)
Hi jullie,
I am Patricia and I live in Indonesia. I found your tutorials recently and I find it very nice and the way you teach with the template makes it easier to follow and make.
I have made a view boxes and come out pretty good.
So I will always follow your tutorials…
Your box is really cute. I love the paper. I love plaid. Thank’s for sharing the details.
Thanks for sharing another cutie! You are so talented!
Super cute project Julie. I personally think plaid makes any project better. I think this box is perfect for jewelry, even though 15 Hershey’s Kisses sounds pretty ok too. I’ll definitely be case’ing and sharing as I have with your other projects.
Couldn’t be cuter! I love the shape of this box, and I love the black rhinestone on this Christmas project…