
Today’s project is my project from last night’s Weekly Wednesday Facebook Live – a Christmas Ornament with a Shadow Box!

Here’s a closer look at the ornament:

I’d like to give credit to Samantha Clayton (mixedupcraft.com) who originally designed this ornament. Her tutorial includes a shadow box for 4 ornaments, so I decided to figure out a small shadow box for just 1 ornament.
Wouldn’t this make a special gift for someone? You can fill it with treats if you’d like!
Here’s my video tutorial:
And here is the template for the ornament:

Here are the templates for the side panels for the shadow box – you’ll need to make two (2) of each:

Thank you so much for stopping by today! I hope you’ll try making one of these to give to a special someone this holiday season! Have a wonderful and blessed day!
Measurements:
Ornament:
- Real Red cardstock – 6″ x 10-1/4″
- Score along the short (6″) side at 1″ and 5″
- Score along the long (10-1/4″) side all the way down at 2-1/2″, 5″, 7-1/2″, and 10″
- Score along the long (10-1/4″) side down to the 1″ score line at 3/4″, 1-3/4″, 3-1/4″, 4-1/4″, 5-3/4″, 6-3/4″, 8-1/4″, and 9-1/4″
- Flip cardstock and score along the long (10-1/4″) side down to the 1″ score line at 3/4″, 1-3/4″, 3-1/4″, 4-1/4″, 5-3/4″, 6-3/4″, 8-1/4″, and 9-1/4″
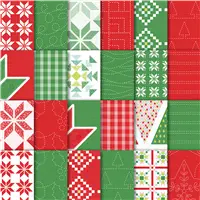
- Quilted Christmas DSP – 2-3/8″ x 1-3/4″ (4 pieces)
Shadow Box:
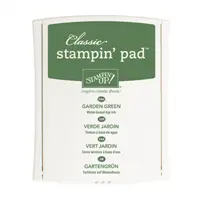
- Garden Green Cardstock Base – 3-3/4″ x 4-1/4″
- Long sides – 6-1/2″ x 5-1/4″ (2 pieces)
- Score along long (6-1/2″) side at 1/4″, 3″, 3-1/2″, and 6-1/4″
- Score along short (5-1/4″) side at 1/2″ and 4-3/4″
- Short sides – 6-1/2″ x 3-3/4″ (2 pieces)
- Score along long (6-1/2″) side at 1/4″, 3″, 3-1/2″, and 6-1/4″
- Score along short (3-3/4″) side only down to the 2nd score line at 1/2″ and 3-1/4″
Window Sheet Cover:
- Window Sheet – 3-1/4″ x 8-1/8″
- Scored at 2-11/16″ along both sides of the 8-1/8″ side











Wow,The ornament and box are beautiful. I thoroughly enjoy your tutorials. You make them seem that anyone can do the project.
Thank you for sharing your talents.
SO cute. thANk you for the idea. I need to make 20 little handouts and I thin think these ornaments I’ll be just the the thing.
Love this. It is just awesome. You have so much patience. I do have a question not really related to your project! What is the wood looking work surface you create your projects on and where can I buy some? Thank you, Terri
Love, love, all the box projects! Thank you so much for making the videos and giving the instructions.
Hi Julie! I am fairly new to Stampin Up. I love making cards. I also enjoy the boxes and now this awesome ornament. Thank you for sharing all your ideas, tips and tricks with us.
Happy Thanksgiving to you and your family.
Sincerely,
Trish
This project is amazing! What fun! The idea that you are planning to make multiples for your neighbors is mind-numbing. I’d not make it through one. You’re a special person with a special talent. <3