Today’s project is a faceted Christmas ornament that I demonstrated during last night’s Weekly Wednesday Facebook Live!

Here’s a closer look:

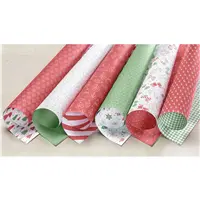
This features the Be Merry Designer Series Paper and looks much harder than it is to make! I followed Samantha Clayton’s tutorial (Mixed Up Craft) – love her projects!
Here’s my shorted Facebook Live video:
Here’s a template for you:

The asterisks represent where to adhere the 17 – 1″ squares of Designer Series Paper. The dots along the top squares are where the 1/8″ holes need to be punched.
Thank you so much for stopping by today and to those of you who joined me for my Facebook Live last night! I hope you have a wonderful and blessed day!
MEASUREMENTS:
- Cherry Cobbler cardstock – 6-1/4″ x 10-1/2″
- Score along the 10-1/2″ side at 1-1/4″, 2-1/2″, 3-3/4″, 5″, 6-1/4″, 7-1/2″, 8-3/4″, 10″
- Score along the 6-1/4″ side at 1-1/4″, 2-1/2″, 3-3/4″, 5″
- Be Merry Designer Series Paper – 1″ x 1″ (17 pieces)
- Garden Green 3/8″ Stitched Satin Ribbon – 10″
SUPPLIES (CLICK ON ANY PRODUCT TO SHOP ONLINE):
[wc_divider style=”solid” line=”single” margin_top=”” margin_bottom=”” class=””][/wc_divider]

NOVEMBER HOST CODE – S2XAJ34V
Please apply this month’s host code for all orders under $150. If you place an order of $75 or more (before shipping & taxes), you’ll earn this month’s free gift: Sparkle Textured Impressions Embossing Folder!
- $75 – $149.99 Order: You must apply the host code to your order to receive this month’s free gift.
- $150+ Order: Do not apply the host code. You’ll automatically qualify for my free gift this month as well as earn Stampin’ Rewards!





I just taught this ornament to a group of ladies yesterday (giving you credit of course) and they absolutely loved it. Plus I made them and filled them with chocolate goodness as my Pillow gifts for my team at the recent OnStage – thank you so much for your fantastic tutorial!!
You can purchase the ornament die from stampdoctor.com
Julie,
I LOVE THIS SO MUCH! My team is having a holiday dinner this week and we are each making an ornament for a tree to be given away in a drawing. I have made two of them. I’ll send you a picture as soon as I can. I LOVE IT. The drawings and detailed directions are MUCH appreciated.
As always, thank you for inspiring me. I loved getting to meet you at Onstage and chit chat..it was so much fun.
Kim
Love this craft…could use as an apple with the green ribbon on top/or brown for a teacher? Or pumpkin maybe? Thank you for the inspiration Julie ! Your instructions are always so clear, and love what you share.
Ich finde es einfacher toll wie du uns das so aufzeigst wie es geht. Mach weiter so
Adorable. Your instructions are so easy to understand.
Awe! Every year I make ornaments for my student’s parents. This might be my project. I care for 10 almost 2year olds. I’m hoping to add 17 photos of each child vs scrapbook paper. This may take awhile but I LOVE the looks of this ornament.
Love these, they are all over I made the mini version using smaller size, they are so cute also. Thanks for your template though, it’s easier to view this way when cutting..
do you have measurements for the smaller version Tilly?
That is so cool; a great project and wonderfully roomy for treats! I love it, Julie; thanks for the great inspiration and tutorial! Blessings! 🙂
i really like how you draw out on a dif pc of paper what pieces will be cut out or folded or scored etc. it really helps when it comes to making the ornament! i know you have done other patterns this way as well. it is soooo helpful! thank you for the work you do to present these things to us.
really cute ornament!
Oh, my! That’s crazy-amazing! You are good, Julie. Oh, you are good!
Great project and beautifully done Julie. I like the idea of adding treats inside. I will be posting my attempt soon.
How did it turn out?