
Welcome to the Pals December 2017 Blog Hop featuring “All that Sparkles and Shines”! Whether you’re just starting the hop, or have come from a previous Pal’s blog, you’ll find the line-up toward the end of my post to help you move along.
My project for today is lovingly referred to on the internets as an “Impossible Box”! But I promise you it’s easier than it looks to create! And really has a wow-factor for the recipient!

Here’s another angle:

Here’s a view of the top of the box:

And here’s what the box looks like when you open it:

So, basically it’s a box with a built-in, attached lid! A self-closing box put another way. I originally saw an Impossible Box tutorial by fellow demonstrator, Josephine Johnson, and fell in love with it. The only challenge is she uses an Xacto knife to make the cuts and I couldn’t find mine, so I stashed the idea away for another time. Then, fellow demonstrator, Angelina Clark, figured out a quick & easy way to create this and I was thrilled!
So, this is my version of the Impossible Box! The box measures 3″ H x 2″ W x 2″ D and it’s a great size to fill with a handful of treats or a candle.
Here’s my video tutorial:
And here is the template I shared during the video:

MEASUREMENTS:
- Thick Whisper White – 8-1/2″ x 8″
- Score on 8-1/2″ (long) side at 2″, 4″, 6″, and 8″
- Score on 8″ (short) side at 2″, 5″, 6″, 7″
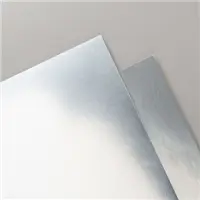
- Silver Foil pieces:
- 1-7/8″ x 1-7/8″ (4 pieces)
- 1-7/8″ x 7/8″ (4 pieces)
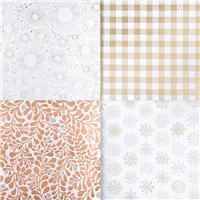
- Year of Cheer Specialty DSP:
- 1-3/4″ x 1-3/4″ (4 pieces)
- 1-3/4″ x 3/4″ (4 pieces)
Thank you so much for hopping with the Stampin’ Pretty Pals today! Now hop along using the Blog Hop Line-up below. Don’t forget to leave us a comment. We really like that.
Blog Hop Line-up:
- Mary Fish at Stampin’ Pretty
- Becky Retzer at Just in Thyme Crafts
- Amy Hoptay at Craft Carnivore
- Peggy Noe at Pretty Paper Cards
- Rae Harper Burnet at Wild West Paper Arts
- Kim Jolley at Stampin’ Artfully
- Su Mohr at Aromas And Art
- Jennifer Michalski at Stamping Serenity
- Julie DiMatteo at The Paper Pixie
- Wendy Klein at Doggone Delightful Stampin’
- Beth McCullough at Stamping Mom
- Lisa Ann Bernard at Queen B Creations
- Pamela Sadler at Stampin’ Pink Rose
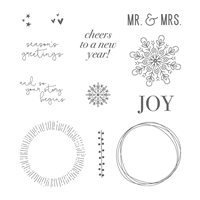
SUPPLIES (CLICK ON ANY PRODUCT TO SHOP ONLINE):







Love, love, love this. Your video was so easy to follow. May you always be blessed for sharing your knowledge. I goT it on the first try. Would you be willing to share how to make this one inch wider? I can only follow not good at figuring things out. ):
I would like to THANK YOU so much for the great idea I needed a box for a birthday and it is great I made 7 of them they will be a big hit tomorrow.I really enjoy your u tubes of ideas I have sit for hours looking at them.
I did not think that I could do this but I did I made mine for st patti’s day it turned out beatiful Thank you, Thank you it is adorable.I am going to try some birthday ones now.
Hello Julie, haven’t tried this one yet, but will. This is an amazingly impossible box for sure. I guess some are having problems with the lid, but I shall see how it goes. I really want this to work!! TYFS
Oh, Julie…I tried this when you first posted it and was disappointed that my closed top had much larger center point than yours. Today I was making the “mini” impossible box that you demonstrated a couple days a go and realized that I was not fitting the top down over the box like is should be! So, tried the original size again and voila! It’s so easy once you do it right! lol
Thanks for the great tutorial! I was able to create a cut file for my Silhouette Cameo with your tutorial.
Thank you for including the measurements here, as well as doing the video! It really makes it easy to watch the video, then reference measurements without having to rewatch. 🙂 ~ Andrea
I LOVE LOVE LOVE this video. you explain everything so well and the box is very nice. I want to try it using larger dimensions. thanks so much for sharing. 🙂
Thanks for such clear instructions and diagrams! I love this box idea!!
I had the same problem and I do have a simply scored. I tried twice and the hole was bigger and the top didn’t fit properly. Rather than waste another piece of paper, I’m going to find another of your projects to copy. Love, love this box though. May try and come back to it for Valentine’s Day. I know it must have been something I did incorrectly.
I had the same problem with the large “hole” in the top when I tried it tonight (first time). I tried it again & used the measurements Angelina Clark (whom Julie linked to in this article) gave, and it worked like a charm. I wonder if, somehow, the 1″ score line measurements don’t allow enough for the box to close properly? Of course, since Julie used those measurements in her video…? Anyway, try Angelina’s tutorial, and see if that doesn’t help! 🙂 ~ Andrea
I’ve tried this twice and both times the hole in the closed lid is a lot bigger than your picture shows. I’m not sure how to correct this. I always do a prototype using “regular” cardstock and I do not have a Simply Scored board, but why would that make any difference? I love your tutorials and find them easy to follow so I’m sure I did everything you did. Tis a puzzlement.
“Mission Impossible Box” made possible by a Pixie! Fantastic! Thank you Julie.
Just adore this, Julie! Thanks so much for sharing ♥
Julie, I love how you made the Mission “Impossible Box” and added the sparkle and shine to it as well. Awesome!!!!! Thanks for sharing 🙂
What a cute box and great idea to do a Facebook live to show how to make it!!
Gorgeous box Julie, I love it!
Such fun! What an incredible creation! Can’t wait to see you make this. <3
I love this! I can’t wait for your FB live tonight.