Today’s project is a Mini Hexagon Gift Bag that I created as one of my swaps for Stampin’ Up!’s 30th Anniversary OnStage event!

Inside, I put a 1″ button magnet that I created with matching Designer Series Paper!

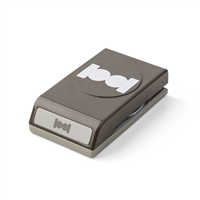
Here’s the side view:

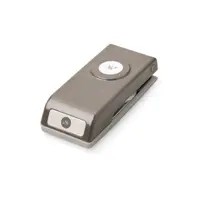
And here’s how it opens with a velcro closure:

I ordered all my button making supplies from Button Boy – I highly recommend them!
Here’s the assortment of Mini Hexagon Gift Bags that I brought with me to OnStage:

Without further ado, here’s my video tutorial:
Here’s the template:

Thank you so much for stopping by today! Be sure to stop back tomorrow as I’ll be sharing a swap card I created for a joint team swap! I hope you have a wonderful & blessed day!
MEASUREMENTS:
- Old Olive Cardstock – 4-3/8″ x 3-1/8″
- Score along the 4-3/8″ side at 1″, 2″, 3″, and 4″
- Rotate clockwise and score along the 3-1/8″ side at 1″ and 2-3/4″
- Score diagonal lines as directed in the video tutorial, then
- Score along the 4-3/8″ side at 1-1/2″ and 3-1/2″ down to the intersection of the diagonal lines
- Under the Mistletoe DSP – 1″ x 1-3/4″
- Triangle piece to hold button magnet – 1″ x 3-1/4″
- Score along the 3-1/4″ side at 3/4″, 1-3/4″, and 2-1/2″
SUPPLIES (CLICK ON ANY PRODUCT TO SHOP ONLINE):


Have a question or comment about today’s post? I’d love to hear from you!
If you enjoyed this post, here are more ways to stay inspired:
- Join my email list and get my free Shadow Box Worksheet
- Shop with me and earn Stampin’ Rewards on orders of $20+
- Explore my project gallery for more creative ideas
You are amazing! These are so clever and love the button magnet. I can’t believe you made 200! Your videos are so amazing…I feel that I can make anything with your instructions!
One of my friends was lucky enough to receive one of these at On Stage. They are absolutely adorable!
Adorable project. Although I can’t believe you made 200!! You were busy!
You and your creations are awesome!! Have a fabulous time at OnStage.