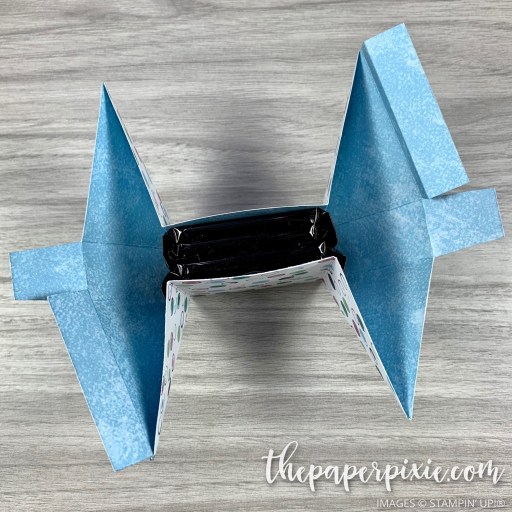
Today’s project is another version of a no-glue treat box!

I love the way this one looks with the diagonal folds exposed on the outside! My inspiration came from THIS blog post and I got to work figuring out the measurements to share it with you!
Here’s a different angle:

Inside are 3 Ghirardelli Squares (without filling – 2 with filling would fit). The interior box dimensions are 2″ x 2″ x 3/4″. Here’s a series of photos to show you how it opens:


How cool is that?!?! It’s so easy – I know you’ll be making lots of these! Without further ado, here’s my video tutorial:
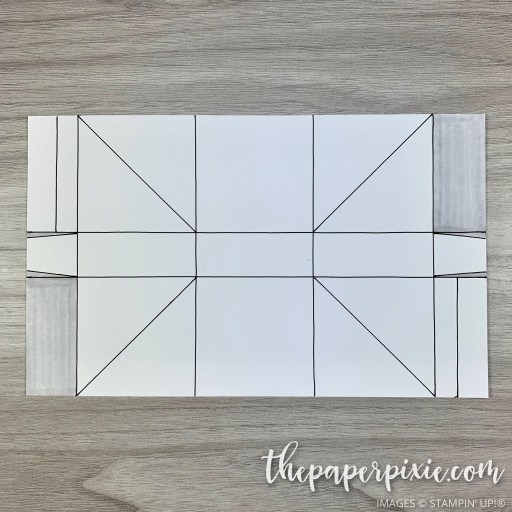
And here’s the template:
Thank you so much for stopping by today! If you give this project a try, feel free to share it on social media with the hashtag #paperpixie and I’ll check it out! Have a wonderful & blessed day!
MEASUREMENTS:
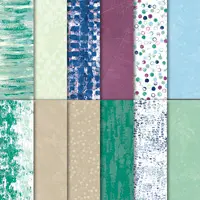
- Tranquil Textures DSP – 4-3/4″ x 7-3/4″
- Score along the 4-3/4″ side at 2″ and 2-3/4″
- Score along the 7-3/4″ side at 7/8″, 2-7/8″, 4-7/8″, and 6-7/8″
- Score along both sides of the 7-3/4″ side at 1/2″, but only down to the 1st horizontal score line (as picture in the template above)
- Balmy Blue layer – 1-3/4″ x 1-3/4″, cut diagonally from corner to corner (yielding 2 pieces)
- Whisper White layer – 1-1/2″ x 1-1/2″, cut diagonally from corner to corner (yielding 2 pieces)
SUPPLIES (CLICK ON ANY PRODUCT TO SHOP ONLINE):


Have a question or comment about today’s post? I’d love to hear from you!
If you enjoyed this post, here are more ways to stay inspired:
- Join my email list and get my free Shadow Box Worksheet
- Shop with me and earn Stampin’ Rewards on orders of $20+
- Explore my project gallery for more creative ideas
Julie, your videos and templates are absolutely THE BEST! Love this no-glue box; can’t wait to make them for my local Girl Scout leader team as table favors for our end-of-year dinner. So fun! Thanks for the inspiration.
I love the treat box, it’s neat how it goes together.
Thanks for all the great ideas and patterns.
Hugs.
Joyce Grigsby
I tried making your previous no glue treat holder (the one with York mini pattys) and they turned out adorable, thanks to your clear instruction video. Today I will make one of these. You are a great teacher. Thank You so much
Gah!! So stinking CUTE! I will be making these for my ladies next month What a great way to use DSP! Thank you, Julie for your wonderful videos and templates- they are the best!!