Today, I’m sharing a tutorial for a paper clutch/handbag that I’m calling a Flowers for Every Season Clutch!

Here’s a pair of them with two different patterns from the Flowers for Every Season Designer Series Paper:

I received a swap several years ago from a team member of mine that I instantly fell in love with and have held onto over the years in the hopes of making one myself! After doing some research, I found out that she followed Bibi Cameron’s tutorial!
I love to “pixiefy” things, so I got to work designing a different version using only one sheet of cardstock (plus a little extra for the handle). My personal handbag inspired this project as well! Here’s a side view:

And a closer look at the front:

It’s a really sturdy clutch and I love the closure – it holds itself together very well! You can use a magnet or Velcro dot to secure it! Here’s how it looks when you lift the flap:

And here’s how it looks all the way open:

Without further ado, here’s my video tutorial:
And here’s the template for reference (not to scale):

Thank you so much for stopping by today! I hope you have a wonderful & blessed weekend!
PROJECT MEASUREMENTS:
- Finished Dimensions – 2-3/4″H x 4-3/4″W x 1-1/2″D (tapers down to 3/4″D)
- Cinnamon Cider cardstock (for clutch) – 8-1/2″ x 11″
- Score along both sides of the 8-1/2″ side at 3/8″ and 1-7/8″
- Rotate clockwise and score along the 11″ side at 1-3/4″, 2-1/2″, 5-1/4″, 6-3/4″, 9-1/2″, and 10-1/4″
- Rotate clockwise again and score along the 8-1/2″ only down to the 3rd score line at 1-1/8″ and 7-3/8″
- Flowers for Every Season DSP:
- 1-1/2″ x 4-1/2″ (1 pc – landscape)
- 2-1/2″ x 4-1/2″ (2pcs – landscape)
- Cinnamon Cider cardstock (for Handle) – 3/4″ x 6″
- Score at 1″ and 5″
PROJECT SUPPLY LIST:
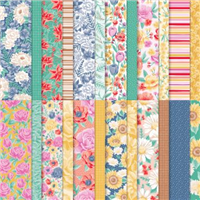
Price: $11.50
Have a question or comment about today’s post? I’d love to hear from you!
If you enjoyed this post, here are more ways to stay inspired:
- Join my email list and get my free Shadow Box Worksheet
- Shop with me and earn Stampin’ Rewards on orders of $20+
- Explore my project gallery for more creative ideas

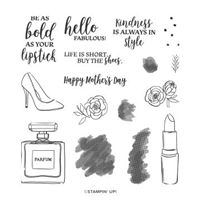
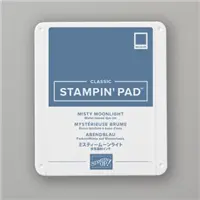




I have made this purse for a friends daughters birthday party to put favors in. They LOVED it.
Hello there, I came across your clutch tutorial and love it including your step by step instructions. Thank you so much. Is there any chance of you doing a tutorial on demonstrating a larger clutch purse in the same style?
Hi Rose! I don’t have any plans to create a larger size, but I will keep it in mind for a possible future project!
Thank you so much for sharing your video and most of all, the instructions
These are fabulous
I made mine Christmas style. Is there a way to post a picture?
I added a 3/4 hole punch inside so it was easier to open inside flap.
Hi,
It’s so beautiful.
I love this project so much.
Thank you a lot.
Simply beautiful! You are very talented. Thank you for sharing the tutorial.
Was great fun , made two!
Awesome !! Easy to make. I have made 3 so far
This is great! I made a bunch for my bridesmaid boxes and filled it with goodies for the girls! Thank you so much for sharing ~ sincerely a confused medical student!
Una felicitación por ser una mujer tan emprendedora y magnífica. Muchos éxitos ❤️ desde México .
Thank you so much, Lupita!
Love this little purse. I’ve made several and plan to teach a small group of ladies here at the retirement community how to make one. Of course I have everything drawn out for them ahead of time and all the extras, too.
I want to know the brand of the black purse you show briefly that has a handle on top like this little purse.
*What a beautiful purse. Thanks so much for the video and directions. Can’t wait to make it.”
Sorry, I have found the measurement.
Thanks!
Kathy
Sorry however I don’t see what size to cut the purse handle. I have looked over the directions a few times. I’m sure I am just missing it as you are always so through with your direction’s.
Thank you!
My apologies! Post updated. Per the video, the handle is 3/4″ x 6″, scored at 1″ on each end.
love it!!! Going to make several for my sisters as a sister gift for when we all get together. Great video you are so precise on your instructions glad that you make your projects so professional thanks
Another adorable box/purse!! I love it!
So cute, your directions are so easy to follow.
Thanks for sharing and I am in love with this clutch bag. I am going to make one tonight. I have two granddaughters that will love this.
Thanks Julie! Love this cute bag!
Love this Julie, I know you posted the website where you order your Velcro buttons before but I can’t find it.
Hi Christy! Thank you! You can find a link to the Velcro dots here: https://thepaperpixie.com/favorites
So cute! My mind has already seen this in Christmas papers filled with treats and gift cards! I know what my next project is going to be. Thanks for sharing.
Oh my gosh!! Julie, this is just beyond adorable, I can think of a good amount of goodies to fit inside this bag, I love it and the papers you used are gorgeous.
As always, your videos are as entertaining as they are incredibly detailed, making it super easy for all of us to follow.
I also love Bibi Cameron’s version, although the purse is smaller, the dies she used are beautiful.
Thank you so much for taking the time to “Pixiefying” the measurements, that’s a big help.
Stay healthy and safe.
Hugs.
Maria Rodriguez.
What an adorable little bag Julie. I just happen to know of a little girl that would love this. Course I’d put a handmade little notebook inside as well. Be safe & TYFS
I love your bag and how you share the measurements and templates. You are very crafty and I love all your projects
Oh! My! Goodness! Stop it right now! This is ABSOLUTELY adorable! Can’t wait to make one … or 10! You are an amazingly talented lady. :).
Thanks for sharing!
I know what I’m doing today❣
Thank you for showing us how to make this adorable clutch!
Marlene
This looks perfect for a cute coffee and cookie clutch gift. I think it will work great for that. It is so cute!! I love it. Thank you!
Adorable… Thank you for sharing your creative talents with us.
Oh , My …. I love this one , going to case it ,
Tfs , it’s BEAUITFUL ♥️
Hugs Frenchie
Just so cute! As always great video and template, thank you. You make crafting fun.
This is adorable!