Today’s card has a really fun and unique layout! My team member, Tara, created a swap card following Robin Armbrecht’s quadrilateral card tutorial and I had to create one myself!

While this card may look like it’s complicated a waste of Designer Series Paper – it’s not and it doesn’t! I am absolutely in love with this card layout! Here’s another look:

This was my thank you card for customers who ordered with me last month! If you’d like to see me create this card live, click the video thumbnail below – it will start right at the point that I begin creating this card.

All you need for the Designer Series Paper portion of this card is a 6″ x 6″ piece. On your Simply Scored or Paper Trimmer, place a tick mark at 1″ on all 4 sides of your piece of Designer Series Paper. Then you will cut it diagonally from tick mark to tick mark as shown in the template below.

The first diagonal cut is easy. When you make the second diagonal cut, you’ll need to hold the 2 pieces together from the first cut. Then you will be left with 4 pieces that you can use to create 4 quadrilateral cards! How awesome is that?!?!
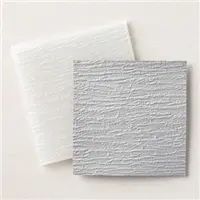
For the Old Olive piece, I just cut a 2-3/4″ x 3-3/4″ piece and embossed it with the Bark 3D Embossing folder. The easiest way to apply the embossed piece is to add the glue to your Basic White in the area you will add it – it’ll create less of a gluey mess than adding adhesive to the embossed piece.
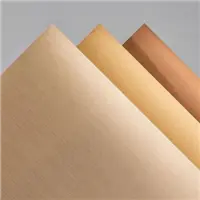
And finally, I cut a strip of Brushed Metallic Cardstock to 3/8″ x 4″. I added a thin line of glue on the Designer Series Paper close to and parallel to the Old Olive edge. Then slid the Brushed Metallic strip in place.
All you need to do then is cut away the excess! This is easy by flipping your card layer over and cutting right along the edge to remove the excess (as shown in my livestream video above).
I hope you’ll give this Quadrilateral Card a try! Thank you so much for stopping by today! I hope you have a wonderful & blessed day!
PROJECT MEASUREMENTS:
- Beauty of the Earth Designer Series Paper – 6″ x 6″
- Place a tick mark at 1″ on all 4 sides
- Cut diagonally from tick mark to tick mark (criss-cross) to create 4 quadrilateral pieces
- Old Olive cardstock – 2-3/4″ x 3-3/4″
- Brushed Metallic Cardstock – 3/8″ x 4″
PROJECT SUPPLIES:


Price: $11.50


Have a question or comment about today’s post? I’d love to hear from you!
If you enjoyed this post, here are more ways to stay inspired:
- Join my email list and get my free Shadow Box Worksheet
- Shop with me and earn Stampin’ Rewards on orders of $20+
- Explore my project gallery for more creative ideas
I love this beautiful card, Julie. Can’t wait to try it. Enjoy your week!
Hi there
I am trying to find the information and the cutting guide for the box you made with this card?
Hi Andre! The box will post on tomorrow’s blog post – stay tuned!
Julie, I tried this card. I turned my DSP to the back side – I could see the tick marks better. Surprise! The DSP was backwards! So my card is the opposite. The DSP goes from the bottom left corner up, with the words on the upper right. Just an FYI to make sure you cut the DSP with the side UP (facing you) as you cut.
Hi Julie! The beautiful thing is this works no matter which way you cut it! Since I used a directional patterned paper, the 4 pieces will actually result in 4 different card layouts! One of my favorite things about this quadrilateral cut! ♥
Love it!! So funny that I saw and worked on a quadrangle card on Monday using the SAB glitter DSP. Your instructions are great!! Looking forward to making more cards with this technique. Thanks.