
Today’s project is a Chocolate and Chapstick Gift Box sized to fit two Hershey’s Nuggets and a mini lip balm featuring the Boughs of Holly Suite!
This post may contain affiliate links and I may earn a small commission if you click on the links and make a purchase at no additional cost to you. As an Amazon Associate, I earn from qualifying purchases. You can read my full disclosure here.

This is a perfect gift box to give as a random act of kindness throughout the holiday season! If you change up the sentiment & colors, it’s perfect all year ’round! Here’s how the chocolates and chapstick fit in the box:

I created a cute little divider to keep the items in their place, which makes me love this little box even more! It’s a sturdy little box too with the divider and reinforced sides! Here’s another look at the box from the outside:

Once I designed this box, I couldn’t stop making them – they’re so cute!! I ended up making 100 of them to bring with me to swap in New Orleans for our demonstrator leadership event, BackStage. In my live replay, I shared tips & tricks to add efficiency for making multiples, because you won’t be able to make just one!
Without further ado, here’s the live replay:
And here’s the template for reference:

I found mini lip balms in this size on Amazon:

Lip Naturals Mini Lip Balms
One mini lip balm fits in each gift box, right beside the chocolates.
Thank you so much for stopping by today! I hope you have a wonderful & blessed day!
PROJECT MEASUREMENTS:
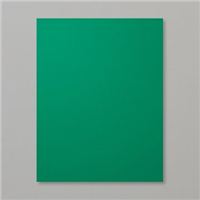
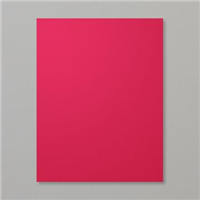
- Cardstock (box) – 5″ x 5-3/4″
- Score along the long side at 3/4″ and 1-1/2″ from each side
- Score along the short side at 3/4″ and 2-1/8″ from each side
- Cardstock (divider insert) – 1-1/4″ x 5-1/16″
- Score along the long side at 2-7/8″, 3-1/2″, and 4-1/8″ from each side
- Cardstock (mat layer for lid) – 1-1/4″ x 2-5/8″
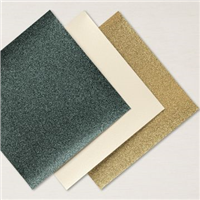
- Designer Series Paper (top layer for lid) – 1-1/8″ x 2-1/2″
- Designer Series Paper (chocolate wrapper) – 1″ x 3″ (2 pcs)
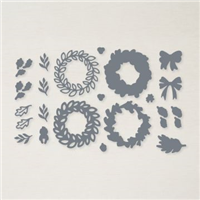
PROJECT SUPPLIES:

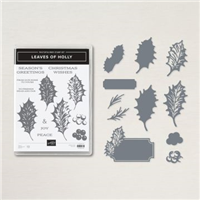
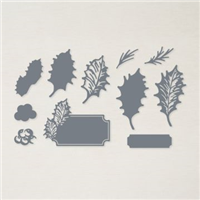
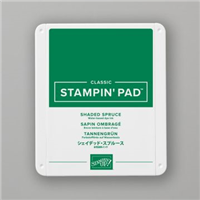
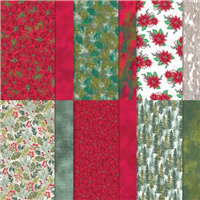



I just made 25 of these!!! Thank you for the great videos, instructions and for inspiring the rest of us!
Silvia
That’s amazing, Silvia! I’m honored to inspire you!
Love all your videos and really appreciate you sharing your great tips and tricks.
Thank you so much, Jacqueline!
Cute little box! Everything from you Are greatful! Love to read your post!
Thank you so much, Hildegunn!
Julie, Thank you for sharing your tutorial videos. I love your great presentations they are clear & most that I’ve seen very easy to reproduce from your tutorial. Love that your projects are more than cards which adds to the stamping projects & keeps the creativity interesting. Can’t express enough how much I love watching YOUR videos & appreciate the time you put in to making them.
Sincerely, MJP
Thank you SO much, Marilyn, for your feedback! It means the world me! I’m honored to inspire and love to share!
Hi Julie, As I’ve mentioned already I love this project. I have now made over 50 for a Fall/Pumpkin Harvest Festival to sell this weekend. I am so grateful for all your inspiration and projects you so freely and willingly teach us. Forever blessed by your creativity. Thank you
Thank you so much, Geann! I am honored to inspire you! I hope your festival is a huge success!
I love your projects and tell others about you! You are so talented ! Ty, for what you do!
You’re amazing!
Ginger Dorr
Thank you so much, Ginger!
Julie, I was so delighted when you did this adorable little box. As I said on the live I have made 300 of these for a quilt retreat 10th. Anniversary remembrance treat. I also gave out your site for anyone who asked me about how to make them. I so enjoyed making these and many of your other projects. Your videos and directions are awesome. Thank you for inspiring us with your creativity.
Thank you so much, Geneva! And 300 is AMAZING! Thank you so much for sharing my website with others! I’m so grateful!
Can’t wait to make a bunch of these. Im in the process od moving from Northern California to Alvaton, Kentuky in the next
month and a half and will be dropping these in many places. Thank you very much.
Thank you, Glenna! A great idea to bring these around with you as you move!
Love this little box Julie. Have fun at Backstage & enjoy New Orleans. Can’t wait to hear how the trip went for you. Be well, Be safe & TYFS
Thank you so much, Claire! BackStage was actually back in August, but I came home with COVID, so I’m just catching up on blog posts!
Ooooh yes , I love your projects,thanks for sharing
Hugs Frenchie ♥️
Thank you so much, Frenchiee!
Love the box, where did you get the mini chap ice, they look great!
Hi Eileen! Thank you so much! I just updated the post to include the links to the Chap-Ice® on Amazon.
Hi Julie… love this little treat box and I actually made 120 of them for a ministry that holds weekly luncheons to women in need. I ordered the mini chapstick from Amazon using your link… love your Wednesday night lives.
Thank you so much, Penny! Wow – 120 of them – amazing!
Hi Julie, I am making these for Christmas plus the 4 boxes from one 12×12 sheet of paper. I give them out to neighbors, grocery clerks, family members, police officers, firefighters,etc!!! Almost anyone I meet gets something!! Thank you soooo much for your fun ideas! I watch every week plus catch up on things I haven’t seen before on YouTube!!
Love this, Carol! Such a special thing to do for others!
As always another adorable craft. I just ordered chap stick. I’m having another craft fair which I should say “Julie’s craft fair.” Have a blessed day
Wonderful, Nancy! I hope your craft fair is a smashing success!
I love this I already bought these little chap ice and been waiting for this PDF. Thank you for all your spectacular ideas and that you share them with us. I love to join you live but here lately I have to be at the organization that I am President of. I always tune in on the replays, in Swanton Ohio. Laura
Thank you so much, Laura! Just a quick note that the Project Sheet has been linked in the video description since shortly after the livestream.
You share the best treat boxes. Love seeing what you come up with each time.
Enjoy watching your videos!
Thank you so much, Bea!
Hi Julie.
Thank you for another great box, great instructions as well the template page! You are so generous!
Blessings to you and family.
Thank you, Michele!
I love all your tutorials. I’m a novice at stamping and you make everything looks so easy. You explain everything so well. I made some cards and have surprised myself at how beautiful they turned out. Wish I had your talent. Thank you for sharing .
Thank you so much, Virginia! That makes me so happy to hear!
I look forward to Wednesday nights every week❣ This box is especially unique. Thank you for all you do to bring these projects to us!
Marlene
Thank you so much, Marlene! I look forward to Wednesday nights too!
I love everything you make! I haven’t been able to order anything this year. We have had a lot medical problems and other issues going on.
Thank you so much, Tamara! I’m sorry it’s been a difficult year for you – thinking of you!
I love this so much! After watching your video, I made them like your other sample for the flight attendants on a trip we recently took. I always take them a little treat, and nine times out of ten, it’s a Paper Pixie treat!! Thank you for sharing with us every week.
That’s amazing, Susan! I’m sure you made the flight attendants’ day!
What a cute project. I’ve never seen chap stick that small. I have to go shopping to get some because I want to make this!!
Hi Wanda! I found the Chap-Ice on Amazon!
Julie, I love your projects as I feel like 3D items are the hardest for me to come up with and you have some awesome ones. You are really good at demoing them.
Where do you get that cut little chap stick?
Thank you, Kelly! I found the chapstick on Amazon and have it linked on my Favorites page!
I love everything you make. You are amazing! Will
You please post a picture of the blue you make for SU and the supplies you used. Thank you so much!
Hi Nancy! Thank you so much! Yes, I will soon! I gave them all away at the Stampin’ Up! event, so I need to recreate it first. I’m still playing catchup around here.
Hi Julie,
I saw this box on a video from someone who received one from you at a recent Stampin Up event. Soooo happy to have found you. Was up to the wee hours last night looking at the wonderful boxes you’ve created. Always on the look out for new ideas. Watched this video. Loved your kids show and tell. You have a nice way of presenting your craft. Thanks for sharing.
Gloria
After the very first post of this little box, I made 75 of them to get ready for Christmas craft fairs. Then I decided to make another 50 for birthday gift choices!
Thank you Julie!
Yay, Terri! I love to hear that! See? They are so addicting and adorable to give out!
Hi Julie,
I love these little boxes you make and so glad you are sending instructions. I try to write it down when you are doing it but always manage to mess up when it comes to the template.. Cannot draw it quickly enough before it disappears!!!
You are uch a happy lady and you make me smile, thankyou
your friend from Scotland
Jill
Thank you so much, Jill! A quick tip when watching video – you can always pause the video and take a screenshot to have something before it’s published to my blog. I have also been linking to the project sheets in the video description.