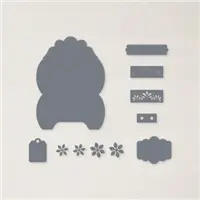
In today’s post, I’m sharing the Pretty Pillowbox Dies 3 ways: a Gift Card Holder, a Letter Opener/Ghirardelli Square Pouch, and a Treat Tote! These dies make the most adorable pillow boxes, but you can create so much more with them too!
This post may contain affiliate links and I may earn a small commission if you click on the links and make a purchase at no additional cost to you. As an Amazon Associate, I earn from qualifying purchases. You can read my full disclosure here.
The Pretty Pillowbox Dies make the most adorable pillow boxes and you can also make the most adorable alternatives with these dies too! I love alternatives to help me maximize the use of my dies, don’t you?
Use the links below to help you jump to the 3 different projects included in today’s post.
Here’s my livestream replay where I share all 3 projects with you!
Without further ado, let’s get to the 3 projects!
Gift Card Holder

This gift card holder is created by strategically adhering two Pretty Pillowbox die cuts together to create the perfect gift card pocket inside! I just love this idea inspired by Julie Gilson at Stampin’ Gala! Here’s a look at what the inside looks like:
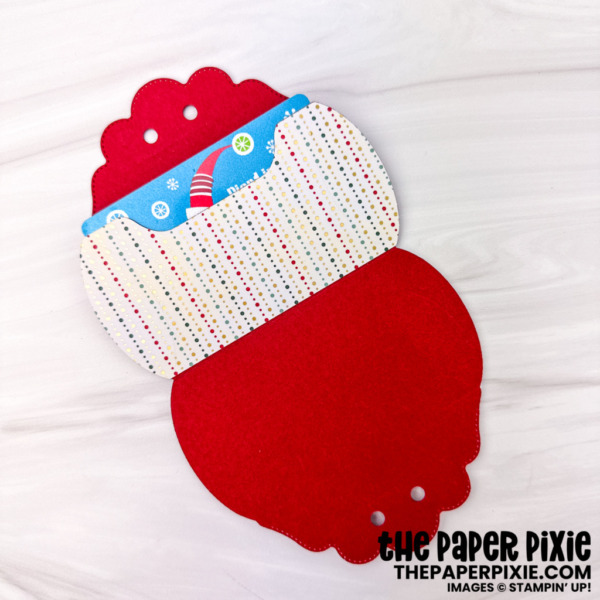
What a great way to give a gift card for the holidays! I absolutely love the shape of the Pretty Pillowbox Dies just as they are before turning them into a pillow box – so many uses for it!
PROJECT MEASUREMENTS:
- Cardstock – 4-1/4″ x 6″ (2 pcs)
- Designer Series Paper – 4-1/4″ x 4-3/8″ (landscape)
PROJECT SUPPLIES:


Price: $15.00


Letter Opener/Ghirardelli Square Pouch

This pouch is so easy to create and it’s inspired by a swap I received from fellow demonstrator Susi Brunk! Jeanie Stark at Just Stampin’ shared a similar project too! It perfectly fits a letter opener or a Ghirardelli Square – perfect gifts for the holidays! Here are the letter openers I recommend on Amazon:


These are a great team member gift and a handy tool for opening Christmas cards!
PROJECT MEASUREMENTS:
- Cardstock – 4-1/4″ x 6″
- Designer Series Paper – 2-1/4″ x 4-1/4″ (full coverage) OR 2″ x 4-1/4″ (maximize paper)
PROJECT SUPPLIES:


Price: $12.00


Treat Tote
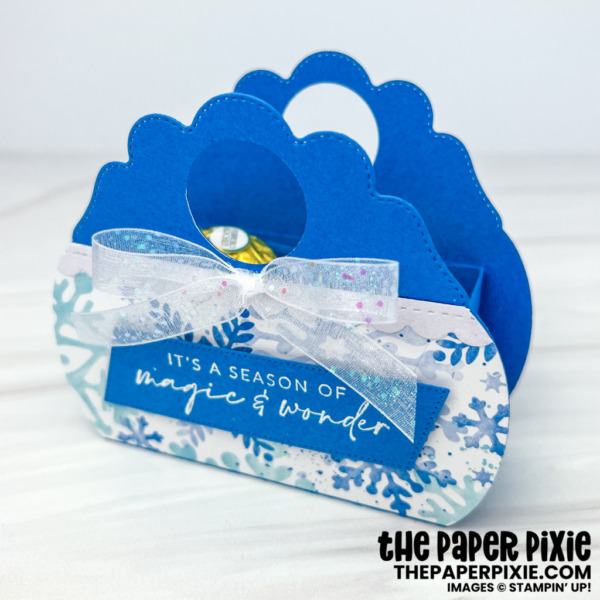
This is a fun treat tote, perfect for a table setting, and can hold 2 Fererro Rochers or other treats! This project is also inspired by Julie Gilson at Stampin’ Gala, but I’ve “Pixiefied” it a little to make sure you can get 2 Pillowbox die cuts and the box insert from one sheet of 8-1/2″ x 11″ cardstock.
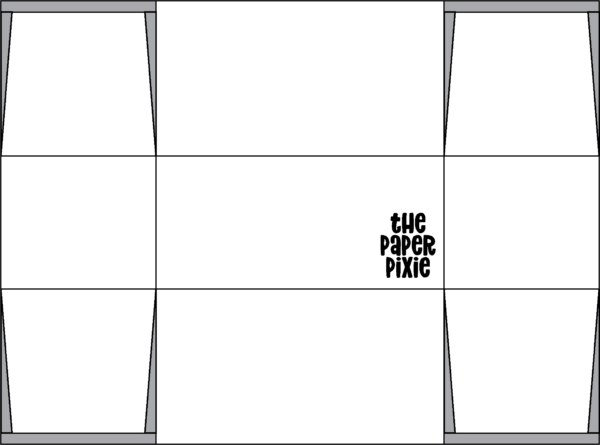
Here’s the template for reference (not to scale) and the Project Sheet for the Pretty Pillowbox Caddy:
PROJECT MEASUREMENTS:
- Cardstock (outside) – 4-1/4″ x 6″ (2 pcs)
- With scalloped edge on the left, line up score line at 1-1/2″ and cut
- Remove curves from bottom section (see video)
- Cardstock (inside box) – 5″ x 6-3/4″
- Score at 1-3/4″ on all sides
- Remove 1/8″ from tabs to prevent overlap
- Designer Series Paper – 2-1/4″ x 4-1/4″ (full coverage) OR 2″ x 4-1/4″ (maximize paper)
PROJECT SUPPLIES:


Thank you so much for stopping by today! I hope you have a wonderful & blessed day!
Have a question or comment about today’s post? I’d love to hear from you!
If you enjoyed this post, here are more ways to stay inspired:
- Join my email list and get my free Shadow Box Worksheet
- Shop with me and earn Stampin’ Rewards on orders of $20+
- Explore my project gallery for more creative ideas
For a birthday party in December for my twin grandchildren’s first birthday, I will be using the
box project filled with goodies as a “thank you for attending the gathering” favor.
I thoroughly enjoy your lives and learn so much from you.
Thank you for all of the thought, time and preparation you put into each project.
You rock!
Sincerely,
Rose
I miss your posts.
Thank you, Sheryl! We’ve been grieving the loss of our beautiful Golden, Murphy, so I took a break from the blog. I’ll get back to posting this week.
My heart goes out to you and your family on the loss of your furry family member.
Hello Julie.
Many Thanks for checking on me. I enjoy the program every week. Happy to see the whole family working together. The children’ s projects are excellent.
I’m enjoying my embossing folders.The Pillow Box dies are nice
Thank you so much, Elaine!
Hi Julie,
There ya go, enabling me oh well, Xmas is coming and you are correct…..good for opening Xmas cards. I misplaced my opener so perfect timing.
Have a great weekend
Nancylee
LOL, Nancylee! I’d never seen these before, but they’re a total must-have – so handy!
Your projects are always so fun! I could spend my whole day just watching you create.
Looking forward to future projects!
Thank you so much, Pam! It’s an honor to be bingeworthy!
Thanks for the wonderful idea. I make a lot of “treasures” for some of the nurses each month and this would be a wonderful surprise for them. You are so special. Thanks for sharing your talent.
Oh, I love that, Dawn! What a wonderful thing to do for nurses/superheroes!
I’ve waited too long to finally scroll all the way to the bottom of your posts to see “leave a comment.” Thank you so much for what you share with all of us. I love making boxes and have a Pinterest board with your name on it! Your work is wonderful.
Thank you so much, Jewel! I am honored to inspire you and grateful you’re a fan!
Thank you Julie for the post today. The boxes are adorable. Can’t wait to make some myself.
Enjoy all your post, and thank you!
Darlene Williams
Thank you so much, Darlene!
I so wish I had your brain! Can you give me just a smidge of it? LOL! These are brilliant. Love all three of them
Thank you, Stesha!