Today’s project is a Treat Box Caddy sized to fit 2 treat boxes created with the Design a Treat Box Dies! This cute caddy is perfect for a table favor!
This post may contain affiliate links and I may earn a small commission if you click on the links and make a purchase at no additional cost to you. As an Amazon Associate, I earn from qualifying purchases. You can read my full disclosure here.

I had so much fun designing this treat box caddy! The Design a Treat Box Dies make the most adorable little boxes, so I thought a pair of them in a caddy would be extra cute! Here’s another angle:

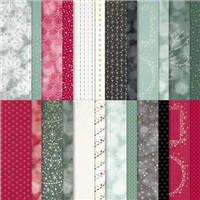
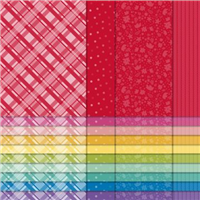
The Lights Aglow Specialty Designer Series Paper works so well for this project too! To conserve paper, start with a 4-1/2″ x 5-1/8″ piece of Designer Series Paper to cut out a treat box. Here’s another look at the treat caddy:

It’s a sturdy little caddy too! Without further ado, here’s the replay of my live demonstration:
Here’s the template for reference (not to scale):

PROJECT MEASUREMENTS:
- Cardstock – 4-1/4″ x 11″
- Score along the 11″ (long) side at 2-3/4″, 4″, 6-3/4″, 8″, 9-3/8″, 10-5/8″
- Rotate clockwise and score along the 4-1/4″ (short) side at 1-1/4″, 2-1/4″ (skip 2nd to
last section), and 3-1/4″
- Designer Series Paper:
- 4-1/2″ x 5-1/8″ (2 pcs) for treat boxes
- 7/8″ x 2-5/8″ (2 pcs – landscape)
- 7/8″ x 1-1/8″ (4 pcs – landscape)
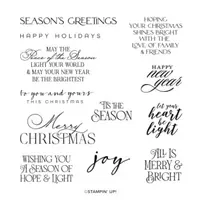
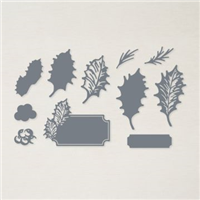
PROJECT SUPPLIES:
Price: $15.00
One treat caddy wasn’t enough…

How about a vertical version? While this post has published after Halloween, I did want to share an alternative with you! The Design a Treat Box Dies come with lots of fun accessories – bat wings, bunny ears, bows, antlers and more – which might not fit in my original caddy design, so I also designed a “vertical” version of this treat caddy! Here’s another look:

Use your imagination and you can have so much fun creating caddies for all occasions with the Design a Treat Box Dies!
Here’s the template for reference (not to scale):

PROJECT MEASUREMENTS:
- Cardstock for caddy – 4-1/4″ x 11″
- Score along the long side at 2-1/2″, 3-7/8″, 6-3/8″, 7-3/4″, 9″, and 10-3/8″
- Rotate clockwise and score along the short side at 1-3/8″, 2-1/4″ (skip 2nd to last
section), and 3-1/4″ - Remove 1/8″ from bottom square sections to prevent overlap as shown in template
above
- Cardstock for treat boxes – 4-1/2″ x 5-1/8″ (2 pcs)
- Designer Series Paper:
- 3/4″ x 2-3/8″ (2 pcs – landscape)
- 3/4″ x 1-1/4″ (2 pcs – landscape)
- 7/8″ x 1-1/4″ (2 pcs – landscape)
PROJECT SUPPLIES:
Thank you so much for stopping by today! I hope you have a wonderful & blessed day!
Have a question or comment about today’s post? I’d love to hear from you!
If you enjoyed this post, here are more ways to stay inspired:
- Join my email list and get my free Shadow Box Worksheet
- Shop with me and earn Stampin’ Rewards on orders of $20+
- Explore my project gallery for more creative ideas









Hi Julie! I made this from your instructions, and finally got around to posting it today on my blog. If you’d like to see it, check it out at: https://www.cherisheachpreciousday.blogspot.com Thanks so much for being such an incredible inspiration, and for continuing to provide us with such great instructions!
Love your reindeer boxes, Patti! Thank you so much!
Hello Thnx great work .I enjoy watching your videos n learning how to make boxes. All your videos are educational . Take care
Is there a stamp still available that says How many fingers are you?
Hi Kay! Not that I can think of. But cute sentiment!
Great video & AH-DOR-ABLE boxes!!! I love making little gift boxes & your ideas are the very best! Thanks so much for sharing!!
Awesome box. Have made about 50 for Onstage swap. So easy…what fits in in the boxes? Hersheys nuggets (available online in Australia), reeces Miniature cups, swizzels love hearts. Thank you Julie for template and video. Hope you are ok. Sending hugs from Sydney Australia xxxx
Julie, you’ve outdone yourself. What an amazing project! Thanks for sharing the directions.
Hi Julie! I love your videos and tutorials! I’m learning to make your small treat boxes and pouches. They are turning out great! But…the small square boxes are going to take some practice. The lids didn’t fit on 4 out of 5 tries. I will figure it out though. Thank you so much for sharing your ideas and expertise! Looking forward to today’s video!
Dear Julie: Once again you totally captured me with this amazing project, these boxes ade not only adorable but they are the perfect gift for the Holidays.
Im going to make them for my Thanksgiving table, we’re having our daughter’s, grandkids and sons in law for Thanksgiving and these little boxes will surely be a hit!!!!!
Thank you so much for sharing this awesome video.
Please stay healthy and safe.
XO
Maria.
Hi Julie. I just adore this cute caddy with the tiny treat boxes. You always amaze me in your way of putting things together and all the extra tips.
You are a beautiful talented young lady and I appreciate you and Bryan’s hard work to share all you do.
Have a wonderful day.
The boxes and caddy are SO cute. Perfect for every holiday. A great thing to have at weddings and graduations too! TFS
Excellent project for all seasons!❤️❤️❤️