
Today’s project is a super quick and easy pinwheel treat envelope that can easily be adapted to different sizes!

Here’s a look at the inside:

This project is easy to make multiples of as well – win-win! You can either make 6 out of 1 sheet of Designer Series Paper (if you use both sides for 1 envelope) or 12 out of 2 sheets of Designer Series Paper. Here’s my video tutorial:
And here’s the template I shared during the video:

Thank you so much for stopping by today! If you missed my Facebook Live on Wednesday this week, I’ve uploaded a shortened version of the video to my YouTube Channel, so be sure to check it out. I hope you have a wonderful & blessed day!
Measurements:
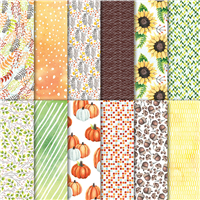
- Painted Autumn DSP – Cut 2 pieces measuring 2″ x 6″
- Score along the long side at 2″ and 4″


Thank you for the ratio. I used this to make a 4” x4” envelope to gift hankies in. It worked well. A cute idea.
Love this project. Efficient use of materials and a fun little package for when I share treats with friends, TFS,
Do you have measurements for making this a gift card holder?
Hi Diana! I don’t, sorry!
Such a cute and quick idea! I love those papers you used.
Such fun! Love this combination of papers! <3
Super cute and always wonderfully easy to recreate!! Thanks so much for sharing! 🙂
Sweet and quick but……….
If you screw up like I did and glue the angles in the opposite direction you can remedy it
by closing clockwise instead of counter clockwise.
Super simple and cute! Thanks for sharing!
I love this lil project so simple and effective
Love watching ur videos