Today’s project is a Napkin Fold Gift Box that I demonstrated during this week’s Weekly Wednesday Facebook Live!

Here’s what the box looks like as you start to open it:

Even more:

And then all the way:

And here’s what it looks like closed and tied with a bow:

Wouldn’t this be an amazing way to give a gift?!? I’d like to give credit to Samantha Clayton (Mixed Up Craft) for this project – I love her stuff!
This box measures approximately 1-5/8″ H x 3-1/8″ W x 3-1/8″ D. It’s a fantastic little size! Here’s my video tutorial:
The napkin fold part of the box is 3″ x 3″ and can just be used as a card if you don’t cut it apart to adhere to the box. It’s also easy to adapt to different sizes. I started with a 6″ x 6″ piece of paper and it folds down into 3″ x 3″, so once you determine the size napkin fold you’d like, just double the size to get to your starting size. Then the scorelines will be at 1/4th of the starting size. So, with a 6″ x 6″ starting piece, you score at 1-1/2″ on all 4 sides. And the tick marks you add are always at the halfway point, so 3″.
Here is the box base template:

Here is the box lid template:

And here is the napkin fold template:

This box is so much easier than it looks to create and I hope you’ll give it a try! If you do, please post it on social media with the hashtag #paperpixie and I’ll look for it!
Thank you so much for stopping by today! I hope you have a wonderful & blessed weekend! See you back here on Monday! ❤
MEASUREMENTS:
- Box Base:
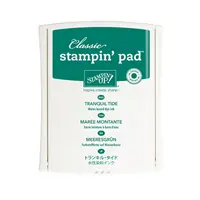
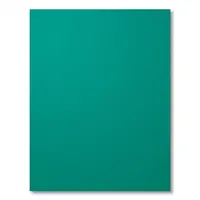
- Tranquil Tide cardstock – 6″ x 6″; Score on all 4 sides at 1-1/2″
- Love What You Do DSP – 1 piece @ 2-7/8″ x 2-7/8″ and 4 pieces at 1-3/8″ x 2-7/8″
- Box Lid:
- Tranquil Tide cardstock – 6-1/8″ x 6-1/8″; Score on all 4 sides at 3/4″ and 1-1/2″
- Love What You Do DSP – 1 piece @ 3″ x 3″ and 4 pieces at 5/8″ x 3″
SUPPLIES (CLICK ON ANY PRODUCT TO SHOP ONLINE):
Have a question or comment about today’s post? I’d love to hear from you!

If you enjoyed this post, please be sure to…
- Use my current host code on orders under $150! Customers who place an order of $25 or more earn Pixie Perks!
- Shop the Clearance Rack with discounts up to 60%!
- Read my Top 10 Reasons why purchasing the $99 Starter Kit is the best decision ever!
- Subscribe to my YouTube Channel for paper crafting video tutorials!
- Visit my gallery for more paper crafting inspiration!




Thanks for the great tutorial for this special box. Of course I left everything and immediately went to create.
I absolutely love this technique, I am a demo and hope to share this with my demo friends.
Hi Julie! I’m a new subscriber to your YouTube channel! Love this project and appreciate your attention to detail in both your written tutorials and your videos! Thanks so much for sharing!
wow!!!
Absolutely the coolest thing ever! Genius!
I just love this little box. The perfect little box to put a baby’s necklace in for the new baby coming in August. Can’t wait for my new Granddaughter.
Can I just mention, that I think this box is great. So, different from other forms of a presentation boxes.
Wow, Julie…this project is breathtaking!! I can’t wait to give my paper engineering skills a workout and make one of my very own! Thank you SO much for sharing this neat project and making a video to show us how it’s done!
With much appreciation,
June in KS
What an amazing project from an incredible Facebook Live! You always WOW me, Julie! <3