Today’s project is a smaller version of the Diamond Box I’ve shared before – this time I’ve created it without the Gift Bag Punch Board!

Here’s a different view of the top:

Here’s a view of the faceted sides:

And here’s a view of what’s inside!

This box measures 1-1/2″ x 1-1/2″ x 1-1/2″ and fits things like tealights, Fererro Rochers, Lindor Truffles – and I am sure lots of other things you can come up with! I just love this box!! Here’s my video tutorial:
Here’s the template for the box base:

And here’s the template for the box lid:

Thank you so much for stopping by today! I will be spending the weekend in Chagrin Falls, Ohio (outside Cleveland) celebrating a very special man’s life – my “Uncle” Tom. Here we are pictured in our matching Carhartt jackets back when I was in high school:

How blessed I am to have been loved like a daughter by him. I’m looking forward to celebrating his life and the impact it had on so many with some very special people this weekend. I hope you have a wonderful & blessed weekend!
MEASUREMENTS:
- Shaded Spruce cardstock – 3″ x 6-1/2″
- Score along 3″ side at 1-1/2″ and 2-3/8″
- Rotate clockwise and score along 6-1/2″ side, only down to the first horizontal score line at 1-1/2″, 3″, 4-1/2″, and 6″
- Rotate 180 degrees and score along the 3″ side, only down to the first horizontal score line at 1-1/4″, 2-3/4″, 4-1/4″, and 5-3/4″
- Score diagonally in both directions between the 2 horizontal score lines to meet the top vertical score lines to the bottom vertical score lines (see template above)
- Garden Impressions DSP – just “a hair” larger than 2-3/4″ x 2-3/4″ (to ensure the lid fits)
- Score on all 4 sides at 5/8″
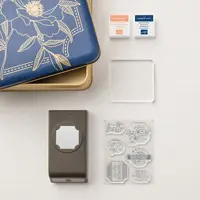
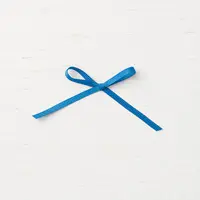
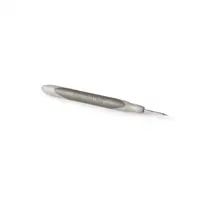
SUPPLIES (CLICK ON ANY PRODUCT TO SHOP ONLINE):


Have a question or comment about today’s post? I’d love to hear from you!
If you enjoyed this post, here are more ways to stay inspired:
- Join my email list and get my free Shadow Box Worksheet
- Shop with me and earn Stampin’ Rewards on orders of $20+
- Explore my project gallery for more creative ideas
Perfectly adorable box, and excellent tutorial (concise and completely informational)! Thanks so much!
Oh Julie, this is such a sweet and beautiful box, love the diamond design on the bottom, what a fabulous structure!!!
I agree with Linda, you are one of the most amazing crafters I’ve seen, your videos inspire and teach, your directions and templates are beautifully explained and this makes it easy for us to follow.
Yesterday I spent an entire afternoon creating some of this beautiful boxes for the Ferrero Rocher chocolates, which are some of my favorites, (looks like they might be yours too, 😉 ) and they fit in them perfectly.
Thank you so much for your generosity and time.
Sending big hugs and love.
Maria Rodriguez.
I love that the top of your diamond box is perfect for this punch. Love this design! such fun! You rock, my friend! <3 Enjoy your weekend. <3
I follow your posts faithfully~don’t often comment, but I just had to tell you that no matter what adorable project you are creating, your videos and templates are perfection. Thank you for taking the time to make such thoroughly professional and explicit tutorials. Always just what we need, never extraneous stuff, completely entertaining, and 110% useful. Bravo, you! And your design aesthetic is unmatched. I have to start my days with a “Julie Fix”! Thanks for all your wonderful inspirations.
I love all of your boxes but this one is really cute. What are the measurements if I wanted to make it larger, ie 3x3x3 or so? It would be great for Christmas treats.
Thank you