Today’s project is a Faceted Gift Box that was originally an origami box, but I have “pixiefied” it!

Here’s a slightly different view:

And here’s another view showing more of the facets:

I originally tried this origami box 2 years ago around the holidays, but it never made it to my blog because I wasn’t happy with how little space was left inside with the way it folded together! So, I’d like to thank Samantha Clayton from Mixed Up Craft for her wonderful ideas to add more space to the inside. I have further “pixiefied” it to make it a little easier to put together.
This box is easy to create in many different sizes. Here’s a bundle of them created from 6″, 8″, 10″, and 12″ square pieces of paper:

The little 6″ one perfectly fits a Ferrero Rocher! Wouldn’t these be just divine for holiday gifts? They are sure to wow the recipient! See below for all the different measurements to create the 4 boxes above.
Here’s my video tutorial:
And here’s my template:

I hope you’ll give this box a try! It is much easier than it looks, I promise! Please share your creations with me! If you share via social media, add the hashtag #paperpixie and I’ll be sure to take a look! You can always email me pictures too!
Thanks for stopping by today! I hope you have a wonderful & blessed weekend!
MEASUREMENTS:
- 8″ x 8″
- Score on all 4 sides at 2″
- Score on all 4 sides only down to the 1st horizontal score line at 4″
- Cut DSP to 1-3/4″ x 1-3/4″ (6 pieces) and cut diagonally to create 12 triangles
- 6″ x 6″
- Score on all 4 sides at 1-1/2″
- Score on all 4 sides only down to the 1st horizontal score line at 3″
- Cut DSP to 1-1/4″ x 1-1/4″ (6 pieces) and cut diagonally to create 12 triangles
- 10″ x 10″
- Score on all 4 sides at 2-1/2″
- Score on all 4 sides only down to the 1st horizontal score line at 5″
- Cut DSP to 2-1/4″ x 2-1/4″ (6 pieces) and cut diagonally to create 12 triangles
- 12″ x 12″
- Score on all 4 sides at 3″
- Score on all 4 sides only down to the 1st horizontal score line at 6″
- Cut DSP to 2-3/4″ x 2-3/4″ (6 pieces) and cut diagonally to create 12 triangles
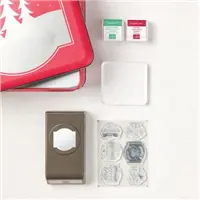
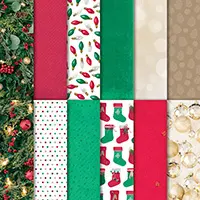
SUPPLIES (CLICK ON ANY PRODUCT TO SHOP ONLINE):


Have a question or comment about today’s post? I’d love to hear from you!
If you enjoyed this post, here are more ways to stay inspired:
- Join my email list and get my free Shadow Box Worksheet
- Shop with me and earn Stampin’ Rewards on orders of $20+
- Explore my project gallery for more creative ideas
I love this gift box. I am making them and gifting them army dentist office. Just what they need, candy!
You are such a great teacher. Very easy to understand and follow along.
12/18/23. Jacque
Thank you, dear Papierpixie, for your tutorial. I came back to your blog to make another piece of the faceted gift box. I love your tutorials, I am fascinated and did quite a lot of little boxes using them as little packages for Ferrero Rochers. Thanks so much.
Anneliese in Germany
Thank you so much, Anneliese! I am honored to inspire you!
This box is too cute! I will make not one but several to use as favors for a party.
Because you are a great teacher with easy to follow directions, you are my favorite!
Thank you for your generosity of sharing with us.
Wonderful gift box!!!!
Wonderful …… i love it so much… thank you for this idea
Totally agree! great job, great teacher, very inspiring!
I love the templates which greatly facilitates following the instructions.
Thank you!!
Wonderful clear directions, you are a terrific teacher, thank you! I will definitely try this
This might be my fav – just LOVE it!!!
You really do inspire me. TFS. Love your creations.