Today’s project is a Ghirardelli Bunny Treat Box, but it can hold so many other things too!

Here’s a closer look at the box:

Here’s a different angle:

And here’s what the box looks like open:

While this box was designed to hold a Ghirardelli Bunny, it will also fit 2 Mini Ghirardelli Squares, a Snack Size Hershey’s Bar, a large size Andes Mint, and I’m sure you could fit many other fun treats too!
This is quick & easy to make and only needs a 4″ x 5″ piece of cardstock, so you can get 4 of these out of an 8-1/2″ x 11″ piece of cardstock. Without further ado, here’s my video tutorial:
And here’s the template:

I order my magnets from
I’m headed to Charlotte this weekend for OnStage Local, a demonstrators-only event and I’ll get my hands on the new Annual Catalog! I can’t wait! I’ll try to post fun things while I’m there on my Facebook Page, so be sure to stop by and follow my page!
Thanks for stopping by today! I hope you have a wonderful & blessed weekend!
MEASUREMENTS:
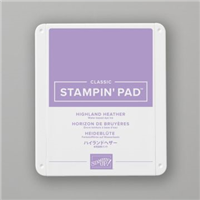
- Highland Heather cardstock – 4″ x 5″
- Score along the 4″ side at 1/2″ from both sides (or 1/2″ and 3-1/2″)
- Score along the 5″ side at 1-1/2″, 2″, 3-1/2″, and 4″
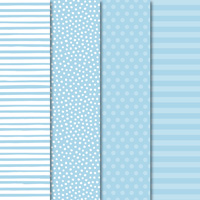
- Subtles 6″ x 6″ DSP:
- 1-3/8″ x 2-7/8″ (2 pieces)
- 7/8″ x 2-7/8″ (1 piece)
SUPPLIES (CLICK ON ANY PRODUCT TO SHOP ONLINE):
Have a question or comment about today’s post? I’d love to hear from you!

If you enjoyed this post, please be sure to…
- Use my current host code on orders under $150! Customers who place an order of $25 or more earn Pixie Perks!
- Shop the Clearance Rack with discounts up to 60%!
- Read my Top 10 Reasons why purchasing the $99 Starter Kit is the best decision ever!
- Subscribe to my YouTube Channel for paper crafting video tutorials!
- Visit my gallery for more paper crafting inspiration!








So very cute and I’ll make some of these boxes this year. I’ll use the thin Velcro fasteners instead of magnets bc they may be given to children
Julie, this is one of my favorites (I made about 20 during spring/Easter) and has become a go-to when I need a little thank you to go along with a card! Your projects are amazing!
Just found your videos and I’m so happy I did. Your directions are just excellent-I appreciate that so very much. What an adorable box and I’ve been wondering how and where to get those tiny magnets.
I ordered the magnets you used for this box. I am nervous about them because of the warning that they can explode. What do you think?
Always love your cute boxes. Your directions are SO user friendly too!