
Today’s project is a gift box sized to fit a Bath & Body Works Foaming Hand Wash!

This was a challenge for me! I’ve been working on a design for awhile now and it’s been a highly requested box – probably since it’s a challenge to come up with a box for it! Here’s what the bottle looks like:

It’s a really unique shape, so I came up with something that I think works really well, and is different! Here’s a look at the front of the box:

Here’s what the side looks like:

And here’s a close-up of the top with the bow & tag:

What’s great about this box is that you can fit so many other things in it! The height of it can be adjusted with the way it is built, since the lid doesn’t slide all the way into the base, but there is also plenty of room for it to rise up if needed! You may just want to add some additional Designer Series paper for the lid if more of it peaks out from the box base.
Without further ado, here’s my video tutorial:
Here’s the template for the BOX LID:

Here’s the template for the BOX BASE:

Thank you so much for stopping by today! I hope you have a wonderful & blessed Labor Day weekend! I’m taking Monday off from blogging, so I’ll be back with a new post on Tuesday!
MEASUREMENTS:
- Finished Box Size: 7-3/8″ x 2-11/16″ x 2-1/16″
- Box Lid – 8-1/4″ x 9-3/4″
- Score along the 9-3/4″ side at 2″, 4-5/8″, 6-5/8″, and 9-1/4″
- Rotate CLOCKWISE and score along the 8-1/4″ side at 2″
- Box Base – 8-1/4″ x 10″
- Score along the 10″ side at 2-1/16″, 4-3/4″, 6-13/16″, and 9-1/2″
- Rotate COUNTER-CLOCKWISE and score along the 8-1/4″ side at 2-1/16″
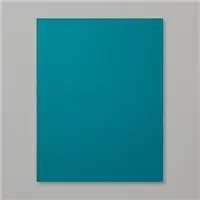
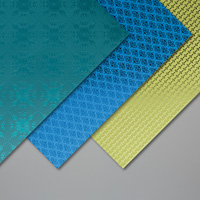
- Noble Peacock Specialty DSP:
- 2-1/2″ x 6″ (2 pieces)
- 1-7/8″ x 6″ (2 pieces)
SUPPLIES (CLICK ON ANY PRODUCT TO SHOP ONLINE):




Do you have a downloadable worksheet for this project.?
Hi Karen! You can use the print button at the bottom of the blog post. This project was made before I starting creating project sheets. When you click the print button, you will be able to delete any parts of the blog post that you don’t want to include in your print out. Hope that helps!
Thank you for designing this box. I made it this morning and it come out perfect. It makes a beautiful gift.
Is there any chance there’s an svg for a cutting machine?
Hi Kathleen! Thanks for your comment! No, I don’t provide SVG files for my projects as I teach how to create them from scratch.
OMG just so pretty. Excellent tutorial. Thanks for sharing your talents with us
Wow! Those Peacock papers make this box even more special. So pretty!
This is just what I’ve been waiting for!!! You made my day with this tutorial. I have the hand soaps ready for the boxes. Thank you so much for the time and effort you spend on these wonderful gift boxes. I am so grateful that you are willing to share them with us. God bless you.