Today’s project is a really cool box that I’m calling a Cubic Geode Box! I want to thank fellow demonstrators Petra Kaess and Sally Shaw for the idea! When Sally shared this box, I HAD to give it a try!

How cool is that?!?! Here’s another angle:

And the box opens from the bottom!

I LOVE this box! Thank you, Petra & Sally! While this box is a bit of a challenge, it is so worth it! Hopefully my template and video will give you the confidence to give it a try! Without further ado, here’s my video tutorial:
And here’s the template for reference (not to scale):

Have a wonderful & blessed weekend!
PROJECT MEASUREMENTS:
- Blackberry Bliss cardstock – 6-1/2″ x 8-1/2″
- Score along the 8-1/2″ side at 2″, 4″, 6″, and 8″
- Rotate clockwise and score along the 6-1/2″ side at 2″, 4″, and 6″
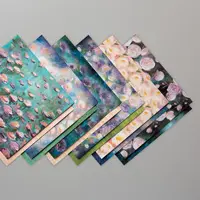
- Perennial Essence DSP
- 1-3/4″ x 1-3/4″ (6 pcs)
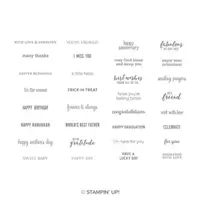
PROJECT SUPPLY LIST:


Have a question or comment about today’s post? I’d love to hear from you!
If you enjoyed this post, here are more ways to stay inspired:
- Join my email list and get my free Shadow Box Worksheet
- Shop with me and earn Stampin’ Rewards on orders of $20+
- Explore my project gallery for more creative ideas
Wow such a neat box I love making boxes can’t wait to try it.
Hi Julie
I was able to make the box so thanks for sharing the pixiefied instructions. I didn’t have BlackBerry bliss paper so I used 2 other bold colours. Regards Shirley
I have made 3 of these (not including my “prototype) in purple, red and blue. I used some Izink Diamond glitter to “paint” the “geode”. When I showed my daughter, she said I should make in Christmas colors and add a string/ribbon so that after the recipient eats the treat, they can hang on their tree as a ornament. I would post pictures, but don’t see a place where to do that.
Awesome and great direction! TFS!
Wow! I can’t believe I made one on the first try. It usually takes me about three tries to get a new box right. This is a unique box indeed. Nobody will be able to figure out how it’s done with that little “box in a box.” Working the paper folds is the key.
This Box is so much fun! I thought of you when I first came across it! I made 35 of these little gems for my coworkers, for when I was able to return to work.I made these boxes and also your teeny tiny milk box. It was definitely a labor of love! I thought you would love it too! I love all your boxes and treat ideas! Julie, you are an inspiration! Thank you for all you do for all of us! You are amazing!
Be Happy, Be Safe! Be Well!
Here we go again….another amazing astonishing creation!!! thanks
You never cease to amaze me with your clever ideas, but this one knocked it out of the park! I can’t wait to give it a try!
OMG!!! You really put your engineering skills to work on this one!!
Very impressive!!!!!!!!!!!
I love the boxes (and everything else) you create!
Your videos and explanations are always so clear, which makes me excited to try the project myself. Thanks so much for sharing your amazing ideas!
Wow Julie this is a winner. You are just amazing with your paper engineering. Thank you for sharing and providing us with such great instructions and templates.
Oh my Goodness!!! Julie, I’ve never seen a box this unique and beautiful, it’s a work of art!!!
And your video is absolutely perfect to understand how to do this, hopefully, as easy as you did.
I must give this box a try, thank you so much for the detailed directions both on your blog and on your video.
I’ll send you a picture of my box, wish me luck.
Sending hugs, stay safe and healthy.
Maria Rodriguez.
You make the best videos and templates! Your explanations are always “spot-on”. I am a fellow demonstrator and really appreciate all the ideas and projects you share!
Thanks, Julie for your great, clear, easy-to-follow instructions and template. This is a fantastic box. I look forward to trying to make one, then maybe more!