Today’s project is a self-closing treat holder! The treat holder requires no cutting or gluing and holds itself together! Love it! Watch out, these are addicting to make! Here’s the group of them that I’ve made so far:

I was inspired by Jane Allmark’s Christmas version of these treat holders – so cute! Here’s a closer look at them:


Here’s how the treat holder opens:

And here’s how it can be stored flat:

Here are a few things that can fit inside: Lindor Truffle, Mini Reese’s Peanut Butter Cup, Peppermints, Hershey’s Kisses… and much more! It’s a great little treat holder to have a stash on hand for when you need one! Since it can store flat, it’s a great way to use up some of that beautiful DSP you’ve been hoarding holding onto!
Without further ado, here’s my video tutorial:
And here’s what all the folds will look like if you were to open your paper back up:

Thank you so much for stopping by today! I hope you have a wonderful & blessed day!
PROJECT MEASUREMENTS:
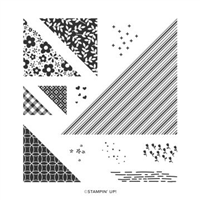
- Flowers for Every Season DSP – 6″ x 6″
- Score on all 4 sides at 2″
- Follow folds as shown in video!
PROJECT SUPPLY LIST:


Price: $11.50


Have a question or comment about today’s post? I’d love to hear from you!
If you enjoyed this post, here are more ways to stay inspired:
- Join my email list and get my free Shadow Box Worksheet
- Shop with me and earn Stampin’ Rewards on orders of $20+
- Explore my project gallery for more creative ideas
Super Clever as always!
I love this. Thank you for sharing!
Great idea! Very clever. Took me a couple of times watching video, but finally got it.
Thanks for the great tutorial!
Thank you Julie. You make such cute paper gifts. Your tutorials are easy to follow and spot on. I always enjoy making your projects.
I love following you, and all the things you do! I usually will make what you do, sometimes I case it, and sometimes I might just change the DSP or the Flower you use. I want to Thank You for sharing, and your Very Clear Directions and Excellent Pattern Directions!
I get to use up old DSP too! Keep up the Great work!
Thank you!
I love all your treat holder creations and your diagrams!! Please don’t ever stop sharing! ❤️
What a great tutorial ~ thanks so much Julie!
You always make everything seem sooo easy.
Thank you so much for sharing your talents.
Kind regards,
Lynne
Sydney Australia
I like your treat holder, but the You Tubes are too fast for me. Do you have or can send written directions? Many thanks.
Hi Nancy! My best suggestion is to pause the video if you need time to catch up with the steps. You can always rewind/replay as needed! You can also check out my live demonstration from this week: https://www.facebook.com/ThePaperPixie/videos/3389885421021856/
As Julie has mentioned, just pause the video as you go along. I do this more times than not, only to get the project done as intended to be. I think my mouse will need replacing by scrolling forwards and backwards. This does help me in whatever I do. Don’t give up Nancy, you can make this project.
Another adorable idea!!!
another FANTASTIC idea!!!! thank you