

Welcome to InKing Royalty’s November Blog Hop! During this year’s blog hops, we are enjoying a year of celebrations. This month’s projects celebrate Christmas, which – believe it or not – is just around the corner. Please prepare yourself for lots of beautiful projects that share the joy of this holiday. We are excited to share our creations with you today! After you read my post, I hope you’ll hop over to the next person on the list at the base of this post.
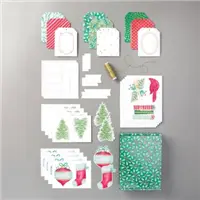
I had lots of fun with my projects for today’s blog hop! I created a set of 6 cards from the Tag Buffet Project Kit!

And how awesome is the gift box the Project Kit comes with!?! Each card measures 3-1/2″ x 3-1/2″. I simply just trimmed the tags to fit that size card base. This project kit is full of beautiful elements and pieces to play with and I wanted to show you an alternative to tags! Here’s a look at the 6 cards laid out together:

And here they are individually:


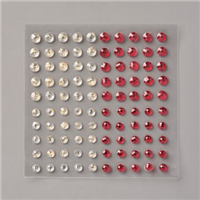
I kept the layouts mostly the same as the suggested layouts in the kit, but I decided to add the gold twine in different ways along with some Wonderful Gems for a touch of bling!
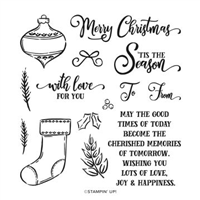
I absolutely LOVE this project kit and the stamp set that coordinates with it! The fonts in the stamp set are to die for! Here’s a closer look at the stamp set:

I added a sentiment (in a coordinating color) to the inside of each card like this:

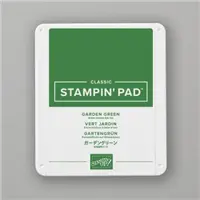
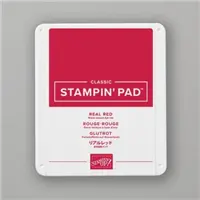
Please note that the stamp set is sold separately! You can find all the supplies I used below!
Thank you so much for stopping by today! I hope you’ll hop along to the next stop on the blog hop, Rachel Brumley at Artistic Designs by Rachel. Have a wonderful & blessed day!
If you get stuck during the blog hop, please use this line-up as a guide:
- Brian King at Stamp with Brian
- Ann Murray at Murray Stamps Ink
- Candy Ford at Stamp Candy
- Sheryl Sharp at Sharp Notes by Sheryl
- Julie DiMatteo at The Paper Pixie ← YOU ARE HERE!
- Rachel Brumley at Artistic Designs by Rachel
- Jackie Beers at Blue Line Stamping
- Sue Jackson at Just Peachy Stamping
- Joanne Brown at The Inky Dragon
- Lynn Kolcun at Avery’s Owlery
- Pam Morris at Tap Tap Stamp
- Renae Novak at Blessed by Cards
- Linda Krueger at The Stamp Coach
- Shawn de Oliveira at Shawn Stamps
- Robin Myren at Songbird Designs by Robin
PROJECT MEASUREMENTS:
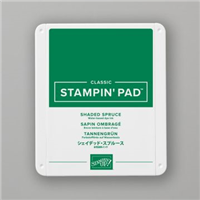
- Garden Green, Real Red, and Shaded Spruce card bases – 3-1/2″ x 7″, scored and folded in half at 3-1/2″
- Trim larger tag to 3-1/4″ x 3-1/4″
- Trim smaller tag to 3″ x 3″
PROJECT SUPPLY LIST:



Hi Julie, just wanted to say you’re fun even when you think you’re having an off day! Your YouTube Live was so enjoyable. Continued success in your business!
Love that your father said the instructions are where the tickets are.
Thank you so much, Katrina! Papercrafting with my fans is just what I needed on an otherwise chaotic day! ❤️
Hello Julie.
My name is Jean Sunderland and I live in Busselton Western Australia.
Two years ago I watched some tutorials of yours ,and decided I would like to try making some of the boxes, bags and cards but did not have a clue how to get started , so I emailed you to find out how I could find a demonstrator that lived in my area .
You very kindly looked yourself and sent me two names , which as I looked at them , I had a good feeling about one of the names and quickly got in touch with her.
She is a gem and I have been having an absolute ball with this fabulous craft ever since
Your work just blows my mind, it is so incredibly exact and very pleasing to look at.
I will be celebrating my 80th just before Christmas , but i can honestly say, that when I am crafting I feel like a 40 year old .
So,,,,,,,, THANK YOU THANK YOU THANK YOU Julie for getting me off and running with this amazing craft.
The little hanging box you just made is on my list for Christmas giving .
Wishing you and yours a safe , contented , loving and happy Festive Season, from my home town of Beautiful Busselton . Sincerely JEAN
You are so creative. Thank you for sharing. I love the cards!
What a great set of cards! Each one is individually pretty, and would be a great gift set. Gorgeous!
These are amazing! I just saw you show them on your FB Live. So clever to make these into cards! Xo
I love the way you turned the tags into these sweet little cards! The decorated box is a perfect way to gift them.
Love Love LOVE this, Julie! What a great alternative for the kit!
Hi can I still buy products I live in canada?
Hi Gino! Yes, you sure can, but you’ll need to find a Canadian demonstrator, since I’m in the US and can only sell to US customers.
I love what you’ve done! These are absolutely adorable. I never paid much attention to the stamp set that you used, so of course, now it’s going on my next order. Thanks for sharing your creativity.
Julie – first of all when I pull up your site, first thing I see is your smiling face. And that makes me smile.
Love your use of the tag kit – so bright and cheery.
Your cards are very pretty.
Wonderful showcase of this kit!
Julie, your note cards are amazing! What a beautiful gift.
In some ways, this reminds me of an old-fashioned Christmas. It brought warmth & joy to my heart to see such beauty. Thanks!!!
Julie You are amazing! I too love this kit and have made a few cards, but yours are stunning! Great way to showcase the kit! So glad I am an InKing Royal with you!
These cards are adorable. I love that you thought about doing something with cards instead. So cute. Really shows the versatility of that kit.
I came so very close to using the tag kit. Love your little cards.
So cute! What a clever use of the tag kit. Who knew?! Each of your cards is lovely, and so is the box! Thank you for sharing.
How fun that you turned these tags into mini cards – love that! Such a great showcase of this kit and coordinating stamp set. Love it! So happy you hopped with us today!
Adorable…..and then some!
This is the best showcase of the kit I have seen. All of the cards are a Wow!! Thank you for a great idea.