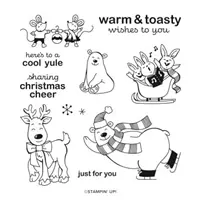
Today’s project is a double slider gift card holder featuring the Warm & Toasty stamp set! This thing is magic and I can’t wait to share it with you!

How cute are those reindeer from the Warm & Toasty stamp set?!?! I had fun coloring them in with Stampin’ Blends! The magic of this double slider gift card holder is that when you pull on the ribbon to slide the top panel out, magically the bottom panel slides out to reveal a stamped sentiment or note (or both)!

Here’s what the double slider gift card holder looks like fully extended.

Need a last minute gift idea? This one’s for you! I promise it’s easier than it looks and you will be amazed and how it goes together! I made another version to hold a Ghirardelli Square a few years ago. You can check that project out HERE.
Without further ado, here’s my video tutorial:

There’s no template for this project, since it’s simple scoring! I hope you’ll give this project a try! It really is a show-stopper and a fun way to give a gift card! It’s a perfect project for so many different occasions: birthdays, teacher appreciation, etc!
Thank you so much for stopping by today! I hope you have a wonderful & blessed weekend!
PROJECT MEASUREMENTS:
- Real Red cardstock:
- 3-3/4″ x 7-3/4″
- Score along the 7-3/4″ side at 3/8″, 2-7/8″, and 5-3/8″
- 2-1/4″ x 3-1/2″ (sentiment sliding panel)
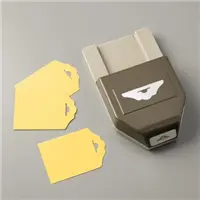
- 2-1/4″ x 4-1/4″ (punch with Fancy Tag Topper Punch for gift card sliding panel)
- 1-3/4″ x 3″ (layer behind reindeer piece)
- 3-3/4″ x 7-3/4″
- Heartwarming Hugs DSP:
- 2-3/8″ x 3-5/8″ (adhere to middle panel of largest piece of Real Red – mountain fold side)
- Whisper White cardstock:
- 2-1/8″ x 3-3/8″ (stamp sentiment)
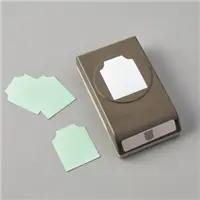
- 1-9/16″ x 2-13/16″ (punch both ends with Essential Tag Punch and stamp reindeer)
PROJECT SUPPLY LIST:


Have a question or comment about today’s post? I’d love to hear from you!
If you enjoyed this post, here are more ways to stay inspired:
- Join my email list and get my free Shadow Box Worksheet
- Shop with me and earn Stampin’ Rewards on orders of $20+
- Explore my project gallery for more creative ideas
I enjoyed the video. I’m going to make these. Thank you for sharing.
I love this gift card holder and you instructions make it so easy to assemble. Thank you for your creative inspiration.
I was going to make this today for my grand daughter. My daughter asked me to pick up Xbox gift card. Well those cards are 3 1/2 X 5 but I watched your video a couple times and made changes in dimensions to make it fit. I forgot to round the corners but it wasn’t too bad for a beginner. Thx for sharing your knowledge and I kept the dimensions so if you would like them let me know I’ll send them on. I tried to leave a pic on Facebook but the site doesn’t allow that. Your work is amazing and I made one of the little triangle purses for her and each of her friends for gift bags. Thx again.
That is wonderful, Barbara! Thank you for sharing! I’m honored to inspire you!
Hello,
What a great gift card holder! Thank you so much for sharing. You mentioned in your video you made one of these slider card to hold a ghirardelli square. Could you tell me where I could find that video or instructions to make that project?
Again thanks you so much for sharing your creation
I did mine but it doesn’t have the same movements. What can I do? What’s wrong?
Love them just made two. Great video.Do you have more written instructions so next year l can remenber how to make them.
Julie,
I just love this double-slider gift card holder. It came out super cute! Thanks for sharing! Happy holidays!
Oh my goodness! What a wonderful project! Can’t wait to try. Made lots of the slider Ghirardelli holders last year. Thank you for your tutorials…they are truly the best! Hope you have a wonderful holiday season! Stay safe!
Julie, Julie, here you go again with a fabulous and fun project for the Holidays, or for any occasion for that matter.
I’ve seen these slider gift cardholders but the videos are a bit hard to follow, but as always, your video is beautifully explained, so detailed and you have the patience to go over the directions to make sure we understand, thank you so much, my dear, I’m going to give this a try.
Stay healthy and safe.
Hugs.
Maria Rodriguez.