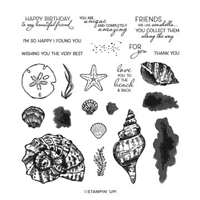
Today’s project is an explosion treat holder featuring products from the Sand & Sea Suite!

Here’s another angle:

And here’s what this sweet treat holder looks like from the side:

This is a “pixie-fied” mini version of Sally Shaw’s Triangle Gift Box! Sally created hers with a 9″ x 12″ piece of Designer Series Paper and mine is half the size using a 4-1/2″ x 6″ piece of DSP. I’ve created similar treat boxes to this one and I’ve fallen in love with each and every one of them! My Explosion Purse tutorial is probably the closest to this one! Another one of my go-to explosion treat holders is this one.
This version fits a Dove Promise, a Hershey’s Nugget, or a Hershey’s Kiss! I’m sure a peppermint or butterscotch too! To get the Hershey’s Nugget to fit properly, you’ll want to place it in the treat holder “portrait”, since the sides fold in quite a bit. Here’s how this explosion treat holder opens:

And here’s what a Dove Promise looks like inside:

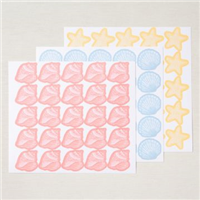
So stinkin’ cute, right?!?! This project doesn’t require any glue! You can close it with Velcro Dots, magnets, or even a belly band of paper or tied with a ribbon! I added the Seaside Shells stickers to this project, which makes it a breeze to create multiples of! I can’t wait to create a stash of these to have ‘at the ready’ for random acts of kindness!
Here’s what this treat holder looks like paired with yesterday’s coordinating card:

Without further ado, here’s my video tutorial:

And here’s the template for reference (not to scale):

Thank you so much for stopping by today! I hope you have a wonderful & blessed weekend!
PROJECT MEASUREMENTS:
- Sand & Sea Designer Series Paper – 4-1/2″ x 6″
- Score along the 4-1/2″ side at 1-1/2″ and 3″
- Score along the 6″ side at 1-1/2″, 3″, 4-1/2″, and 4-5/8″
- Add tick marks along both sides of the 6″ side at 2-1/4″
PLEASE NOTE: This project is really easy to resize! You want to end up with 12 equal squares when you score (if you ignore the super close score line). So, if you want your base to be 2″, then your starting piece should be 6″ x 8″ and you’ll score at 2″ and 4″ along the 6″ side, and 2″, 4″, and 6″ along the 8″ side with tick marks at 3″. I hope that helps!
PROJECT SUPPLY LIST:


Have a question or comment about today’s post? I’d love to hear from you!
If you enjoyed this post, here are more ways to stay inspired:
- Join my email list and get my free Shadow Box Worksheet
- Shop with me and earn Stampin’ Rewards on orders of $20+
- Explore my project gallery for more creative ideas
Please tell me the size of your magnets you use for the cute favor bag. I have some, but they might be too big. Also, can you use a magnet sheet to cut your own. Will that hold the treat box closed?
Hi Nina! I use 1/4″ x 1/32″ neodymium magnets from Total Element. You really need to use a strong neodymium magnet to hold this treat box closed. I’ve linked to the magnets I use on my Favorites Page here: https://thepaperpixie.com/favorites#Magnets-and-Fasteners. And if you use coupon code PAPERPIXIE you’ll receive 10% off!
What size magnets do you use?
Love your box tutorials! Thanks so much.
Hi Doris! Here’s a link to the magnets I use: https://totalelement.com/products/1-4-x-1-32-inch-neodymium-rare-earth-disc-magnets-n48-200-pack#