Before I share my Eden’s Garden Diagonal Slash Card, today starts the Stampin’ Up! 3-Day Seasonal Sale! Today through November 18 Stampin’ Up is offering 10% off cardstock, 15% off ink pads, and 20% off dies from the Annual Catalog! It’s a great time to stock up at a discount! Click the button below to shop the Seasonal Sale!
Want to “double dip” with the Seasonal Sale? Consider adding cardstock, ink pads and dies to a custom Starter Kit, because now through November 30, Stampin’ Up! is offering the $99 Starter Kit for only $75! Add up to $125 in product of your choice to a Starter Kit and pay only $75! The kit ships for free for extra savings! Click the button below to check out my top 10 reasons why the Starter Kit is the best decision ever!
Now, onto today’s Eden’s Garden Diagonal Slash Card!

I absolutely love diagonal slash cards. They are a wonderful way to use your beautiful Designer Series Paper while adding lots of interest with a diagonal sentiment! Here’s another look:

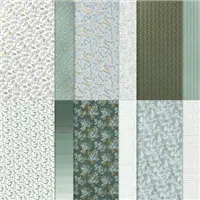
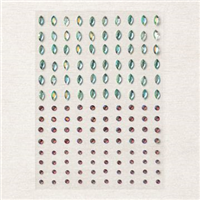
Not only is the Eden’s Garden Specialty Designer Series Paper stunning, but the Eden Dies are incredible! In particular, the border die that I used is just perfect for a diagonal slash card. And the rhinestones? They come from the Garden Gems that are Soft Succulent and, believe it or not, Cherry Cobbler! The Cherry Cobbler gems have a little iridescence to them, making them look green in some angles and red in others – perfect for Christmas!
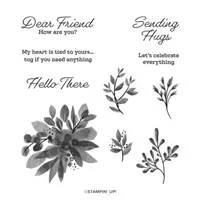
I also stamped the inside of the card with the Eden’s Garden Distinktive™ stamp set!

Want to see how to make this card? Check out my livestream replay from last week HERE. The video will start right at the point I begin creating this card!
Thank you so much for stopping by today! Don’t forget to take advantage of the Seasonal Sale – now through Thursday, November 18!
PROJECT MEASUREMENTS:
- Evening Evergreen card base – 4-1/4″ x 11″, scored and folded in half at 5-1/2″
- Basic White outside layer – 3-3/4″ x 5″
- Eden’s Garden Specialty DSP layer – 3-3/4″ x 4″ (portrait if directional pattern)
- On the paper trimmer, start with DSP in portrait, rotate counter-clockwise until top right corner is 1″ to left of cutting groove and bottom left corner is 1″ to right of cutting groove, then cut (diagonally)
- Gold & Rose Gold 6″ x 6″ Specialty Paper – 2″ x 6″ strip for cutting borders from Eden Dies
- Basic White inside layer – 4″ x 5-1/4″
PROJECT SUPPLIES:


Price: $15.00


Have a question or comment about today’s post? I’d love to hear from you!
If you enjoyed this post, here are more ways to stay inspired:
- Join my email list and get my free Shadow Box Worksheet
- Shop with me and earn Stampin’ Rewards on orders of $20+
- Explore my project gallery for more creative ideas
It’s so good to have you back. I’ve missed your emails. I will be keeping you in prayer as you deal with the loss of your pet, though. Our animals definitely become a huge part of the family.
Thank you so much, Nancy! It’s good to be back! ❤️
I love this beautiful card. Thanks for the video with the tips. Congrats on your SU achievement!! Enjoy your day!
Thank you so much, Hilda! ❤️