
Today’s project is a Mini Card Pouch and Set of mini cards featuring the Lovely in Linen Suite!
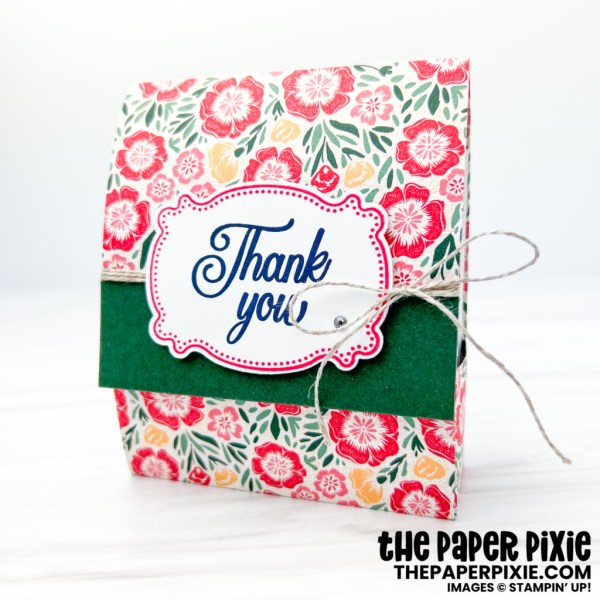
This is a great little pouch to hold a set of coordinating mini 3×3 cards! Perfect to give as a gift or to put in your glovebox to have mini cards on hand to give out as you’re going about your day! They’re sure to bring smiles!

It’s also a great project to not only showcase our double-sided Designer Series Paper, but to use it too! Because we do buy the paper to use it, right? Here’s how the pouch looks open:

And here’s how the cards nestle inside the pouch:

I’ve chosen a Velcro closure for this pouch, but you could also use a magnetic closure! Here’s a closer look at what the mini 3×3 cards inside look like:

Without further ado, I have a video tutorial for you including both the creation of the mini cards as well as the pouch!

Here’s the pouch template for reference (not to scale):

And here’s the mini card template for reference (not to scale) to show you how to get 8 mini 3×3 cards from one sheet of 12×12 patterned paper!

Thank you so much for stopping by today! I hope you have a wonderful & blessed day!
PROJECT MEASUREMENTS:
- Pouch Dimensions – 4″H x 3-1/4″W x 1″D
- Designer Series Paper for Pouch – 6″ x 12″ (portrait if paper has a directional pattern)
- Score along the 6″ side at 1-3/8″ from each side
- Score along the 12″ side at 4″, 5″, and 9″ (top of pattern on left if paper has a directional pattern)
- Mini Card Dimensions – 3″ x 6″, scored and folded in half at 3″
PROJECT SUPPLIES:

Also looking for the envelopes…
Hi Leslie! You can purchase them from Stampin’ Up! here: https://www.stampinup.com/products/basic-white-3-x-3-(7-6-x-7-6-cm)-envelopes?demoid=2149713
Did I miss it? Where did you get the envelopes?
Adorable project & what a great way to carry the 3×3 thank you cards! Thanks for sharing another amazing idea!
This project looks amazing. Thank you so much for explaining how it all comes together. A neat little christmas gift for a few friends.
Thank you! That’s the one I meant on your live. Confused the name. I made cards for 4 pouches!
Thank you, Nelida! I tried responding to your emails sharing your cards, but they all bounced back as undeliverable!
Love this idea! Do you also have the template/dimensions for regular size cards (A2) pouch?
Hi Susan! Thank you! No, I haven’t created a pouch like this for A2 cards.