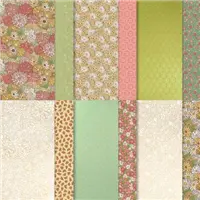
Today’s project is another mini gift bag featuring the Ornate Garden Specialty Designer Series Paper and the Stitched Nested Labels!

How cute are those! The one on the left is tied closed with a bow and the one on the right is closed with a Velcro dot. Here’s a side view:

And here’s a back view:

Which is your favorite! I polled my family and the boys voted for the bow and the girls voted for the flower! I shared a similar project back in March, but I’m obsessed with the size of this mini gift bag, not to mention how easy it is to make, so I made another one!
I love how perfectly the Stitched Nested Label fits this gift bag! I used the 4th largest/5th smallest (depending on how you look at the dies).
Without further ado, here’s my video tutorial:
And here’s the template for reference (not to scale):

Thank you so much for stopping by today! I hope you have a wonderful & blessed weekend!
PROJECT MEASUREMENTS:
- Finished Size – 3″H x 1-3/4″W x 1″D
- Ornate Garden Specialty Designer Series Paper – 4″ x 6″
- Score along the 6″ side at 1-3/4″, 2-3/4″, 4-1/2″, and 5-1/2″
- Rotate clockwise and score along the 4″ side at 1″
PROJECT SUPPLY LIST:
Have a question or comment about today’s post? I’d love to hear from you!

If you enjoyed this post, please be sure to…
- Use my current host code on orders under $150! Customers who place an order of $25 or more earn Pixie Perks!
- Shop the Clearance Rack with discounts up to 60%!
- Read my Top 10 Reasons why purchasing the $99 Starter Kit is the best decision ever!
- Subscribe to my YouTube Channel for paper crafting video tutorials!
- Visit my gallery for more paper crafting inspiration!








LOVE THIS SOOOO MUCH
Awesome! Thanks for sharing!
Love your videos! Thanks for all of them.
Nice and easy project. Thank you for searing.
You are so kind to give us such great videos with perfect directions! I’ve just made about 15…using up some retired paper and will distribute them to local workers!!
Oh my goodness this is adorable! Wouldn’t it make cute little gifts for friends and neighbors who might be stuck at home?
I absolutely LOVE your designs! Thank you so much for sharing your talent with us
Perfect size…just what I was looking for.
Thanks.
Love this little bag. Good idea too that there is no leftover from a 12X12 paper. These are really great to hand out as a special Thank You for all who are helping us stay well! Be safe & TYFS
Adorable & sooo easy!!! The DSP really makes it stand out!
Oh I love that bag , I love easy and pretty, thanks for sharing
Hugs Frenchie ♥️
Love all your projects ♥️